All Students must sign up for a Payment Plan or pay in full.
If you have any pending Financial Aid, your account may show $0.00. You will still need to sign up for a Payment Plan after registering for classes every semester, even if you have Financial Aid.
Need Help? Have a Question?
Contact the KCC Business Office at (269) 965-4140 or busoffice@kellogg.edu
How to Set up a Payment Plan
After you register for classes, you will need to set up payment arrangements.
- Option 1 - Pay in full, using a bank account or credit card.
- Option 2 - Set up a Payment Plan using either a bank account, credit card or Financial Aid.
Step 1: Login to the Bruin Portal,
- Click on the Financial Information (bank) icon,
- Select Student Finance
- Select Set Up Payment Plan or to pay in full, select Make a Direct payment.

Step 2: Click on the Set up a Payment plan button.
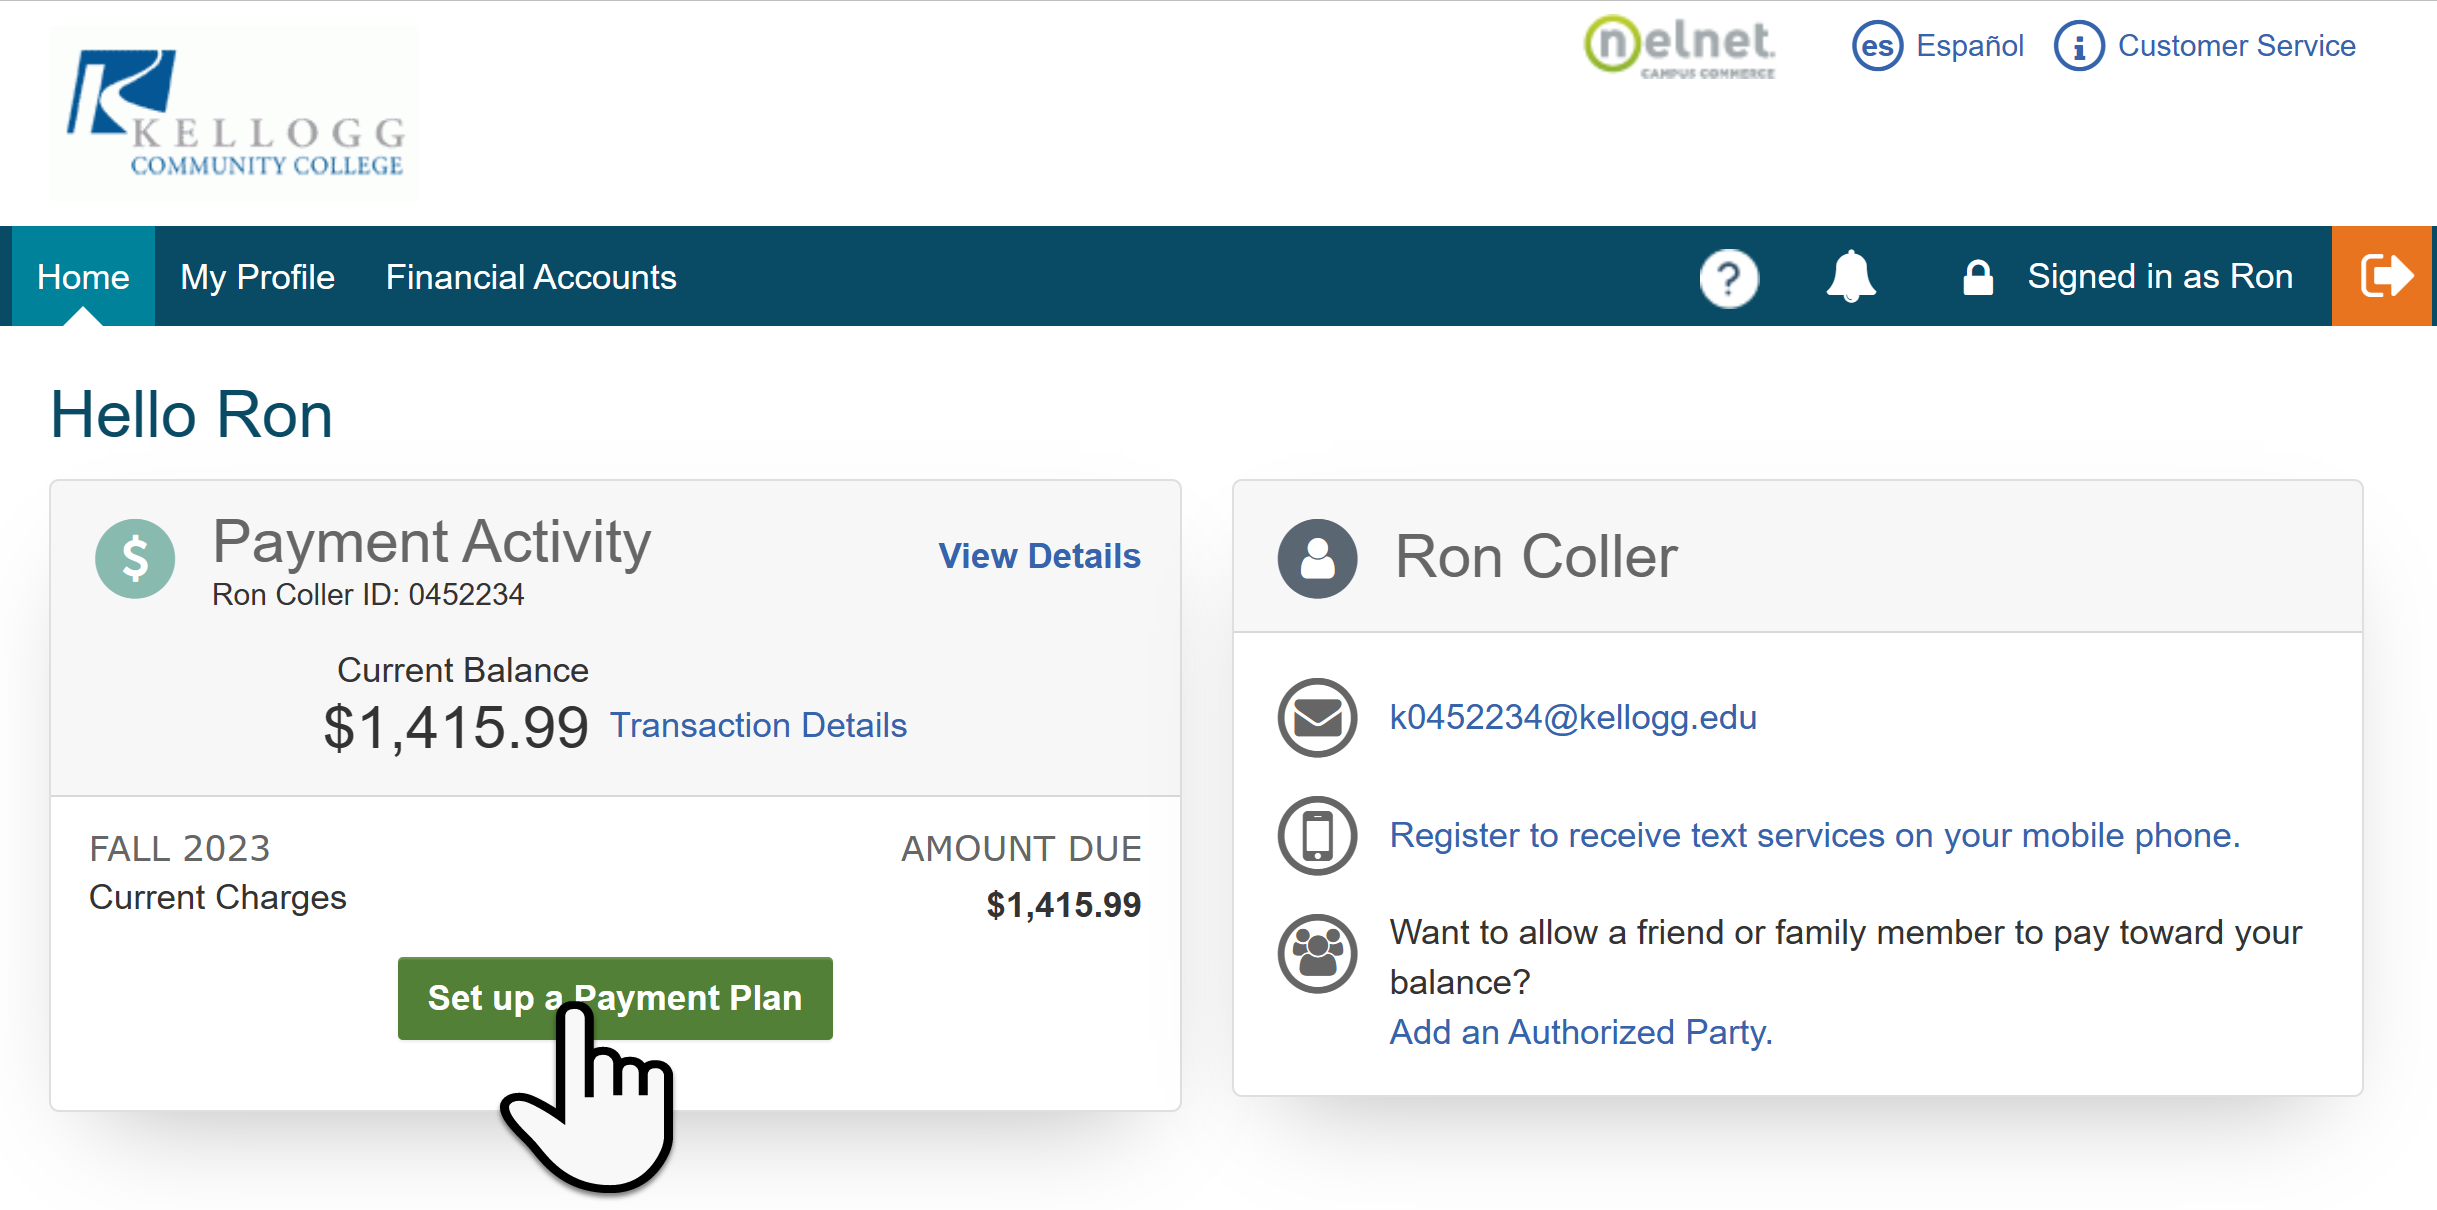
Step 3: If you do not have a Nelnet account, you will need to create one. If you already have an account, you should verify your information every semester and update if needed by clicking on My Profile towards the top of the screen.
3A: Create your Nelnet account: Contact information, verify your name is correct there are options to add a Prefix and/or Middle name. Verify your Address it should be set to the billing address on the Credit Card or that the bank has on file for you. Option to add an additional email address and Phone Numbers. Click Next when finished.

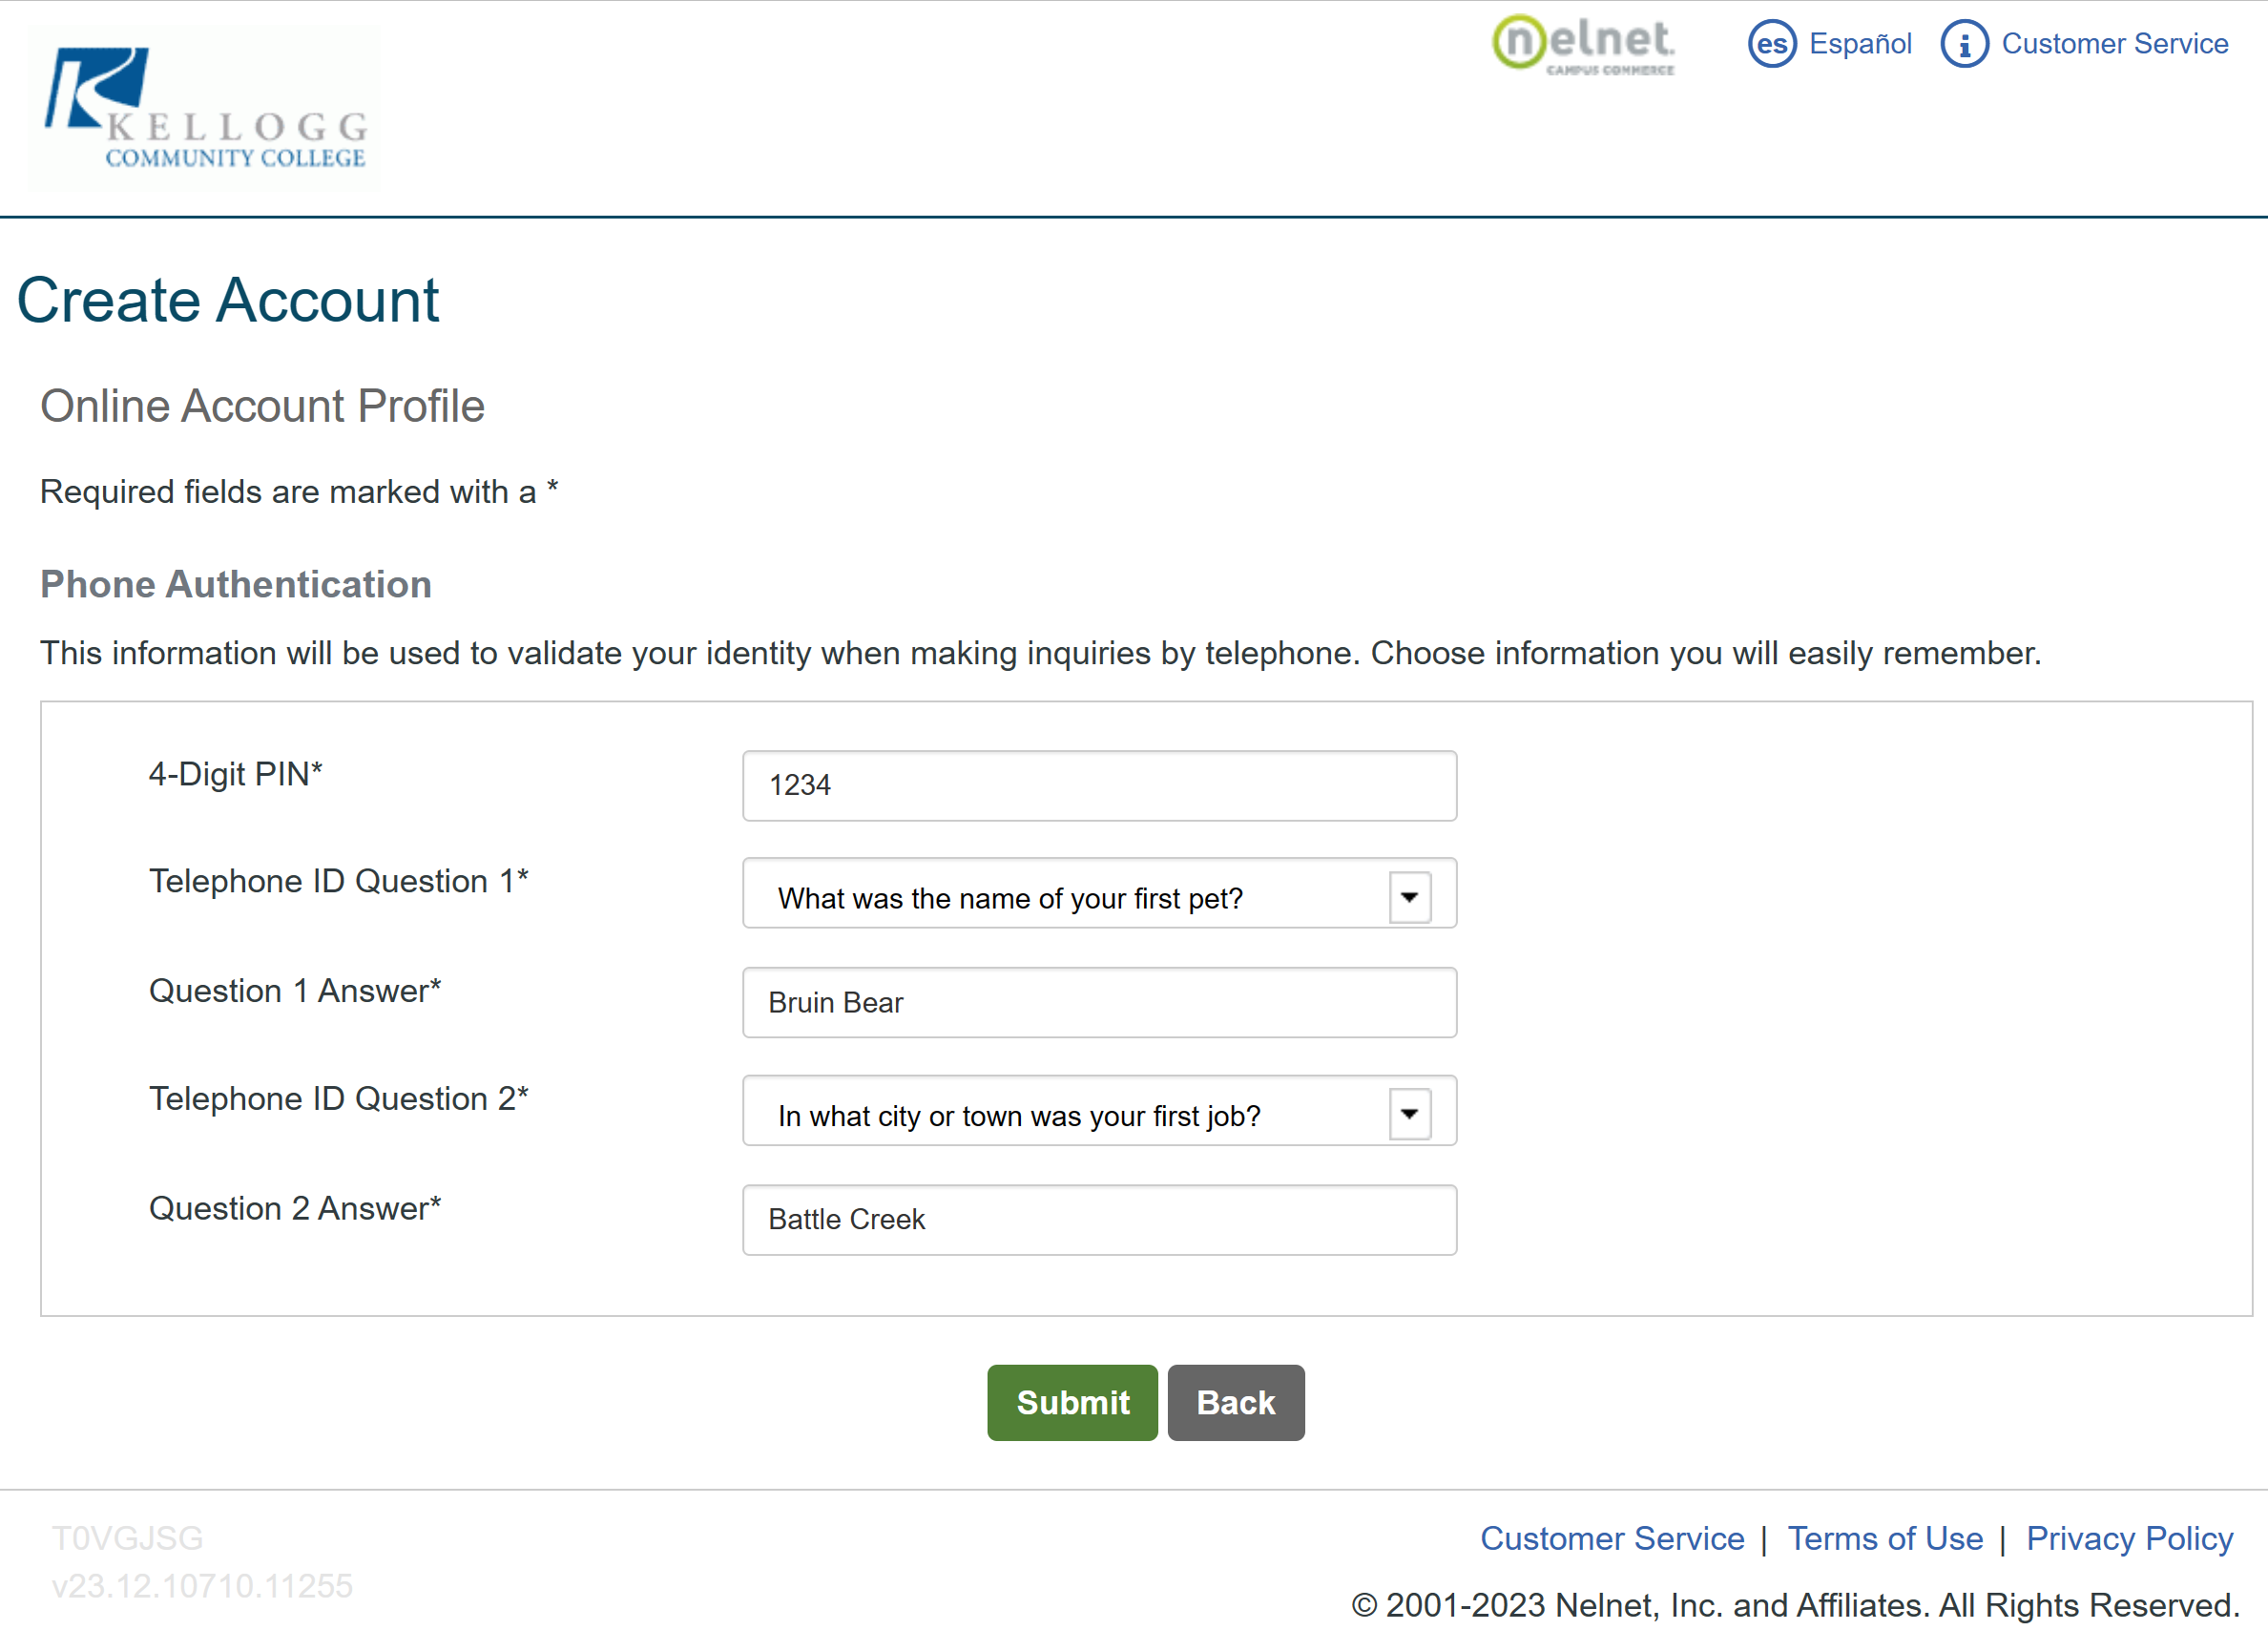
Step 4: Enter a 4-Digit Pin number and select two Telephone ID Questions and enter the Answer for each. These questions will verify your identity if you need to contact Nelnet by phone.
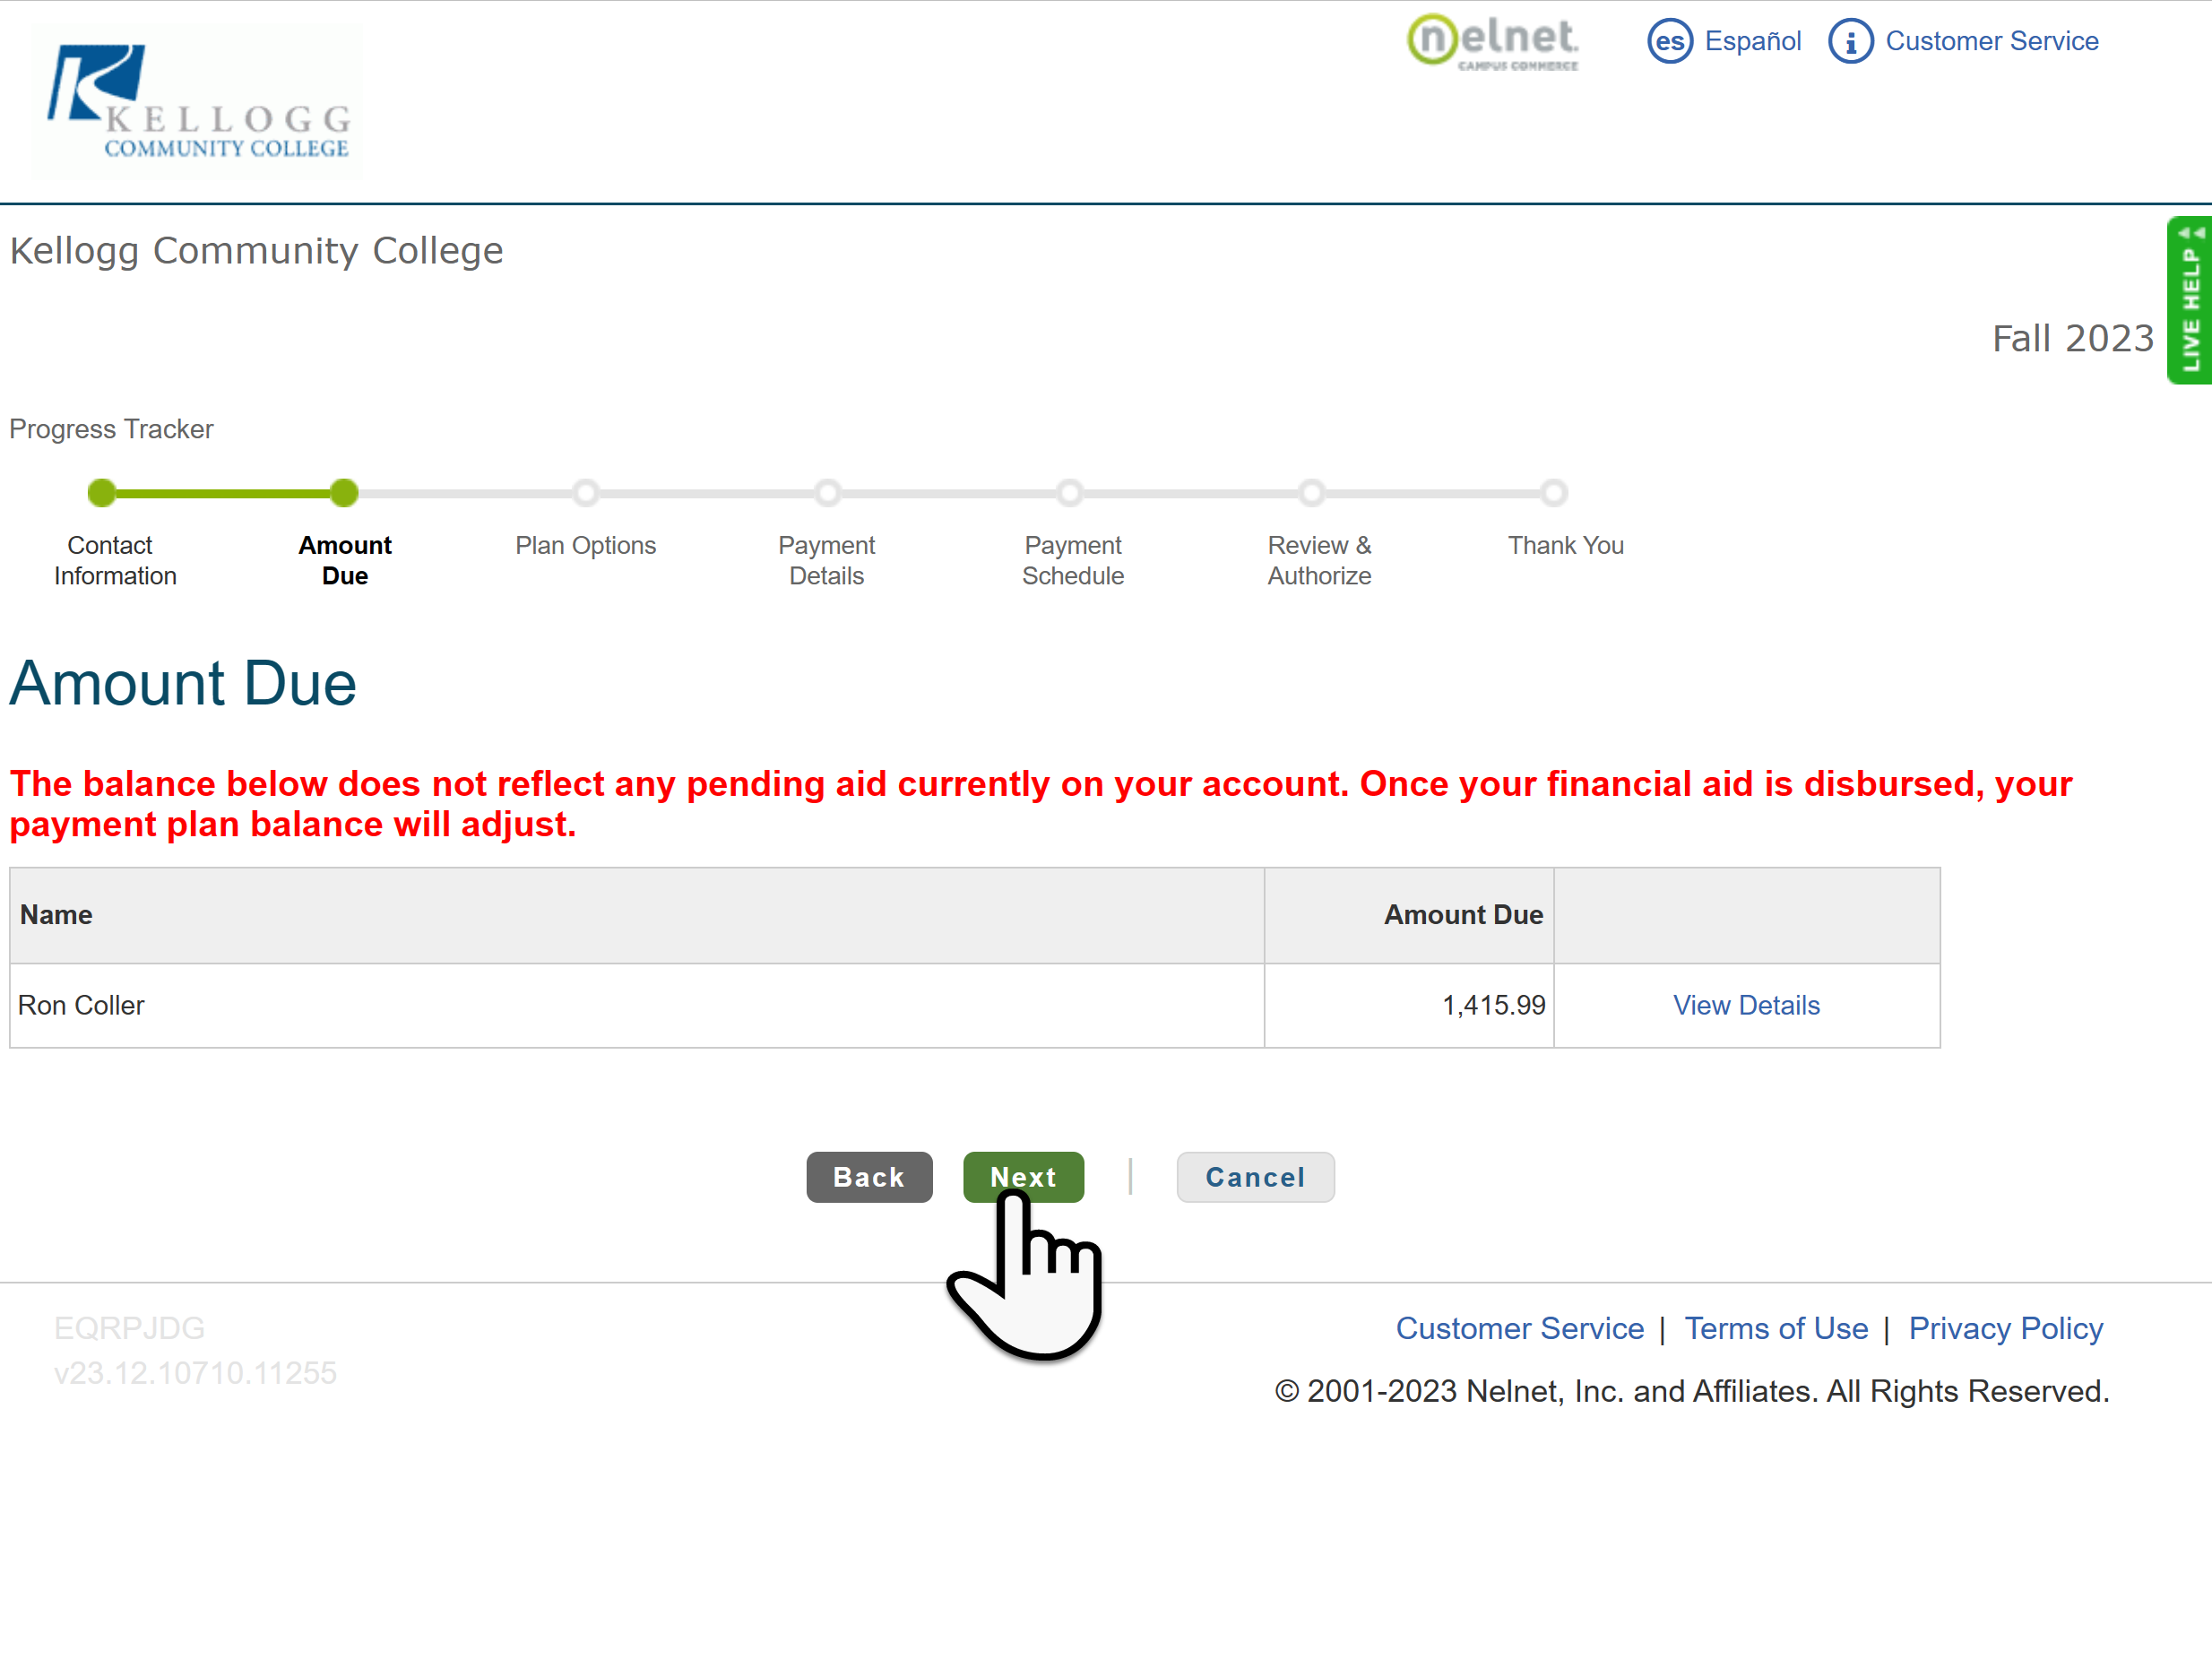
Step 5: The Current Balance is shown without any pending aid. If you are receiving any Financial Aid or Grants, this balance will not reflect any pending credits. Click on Set up a Payment Plan to continue.

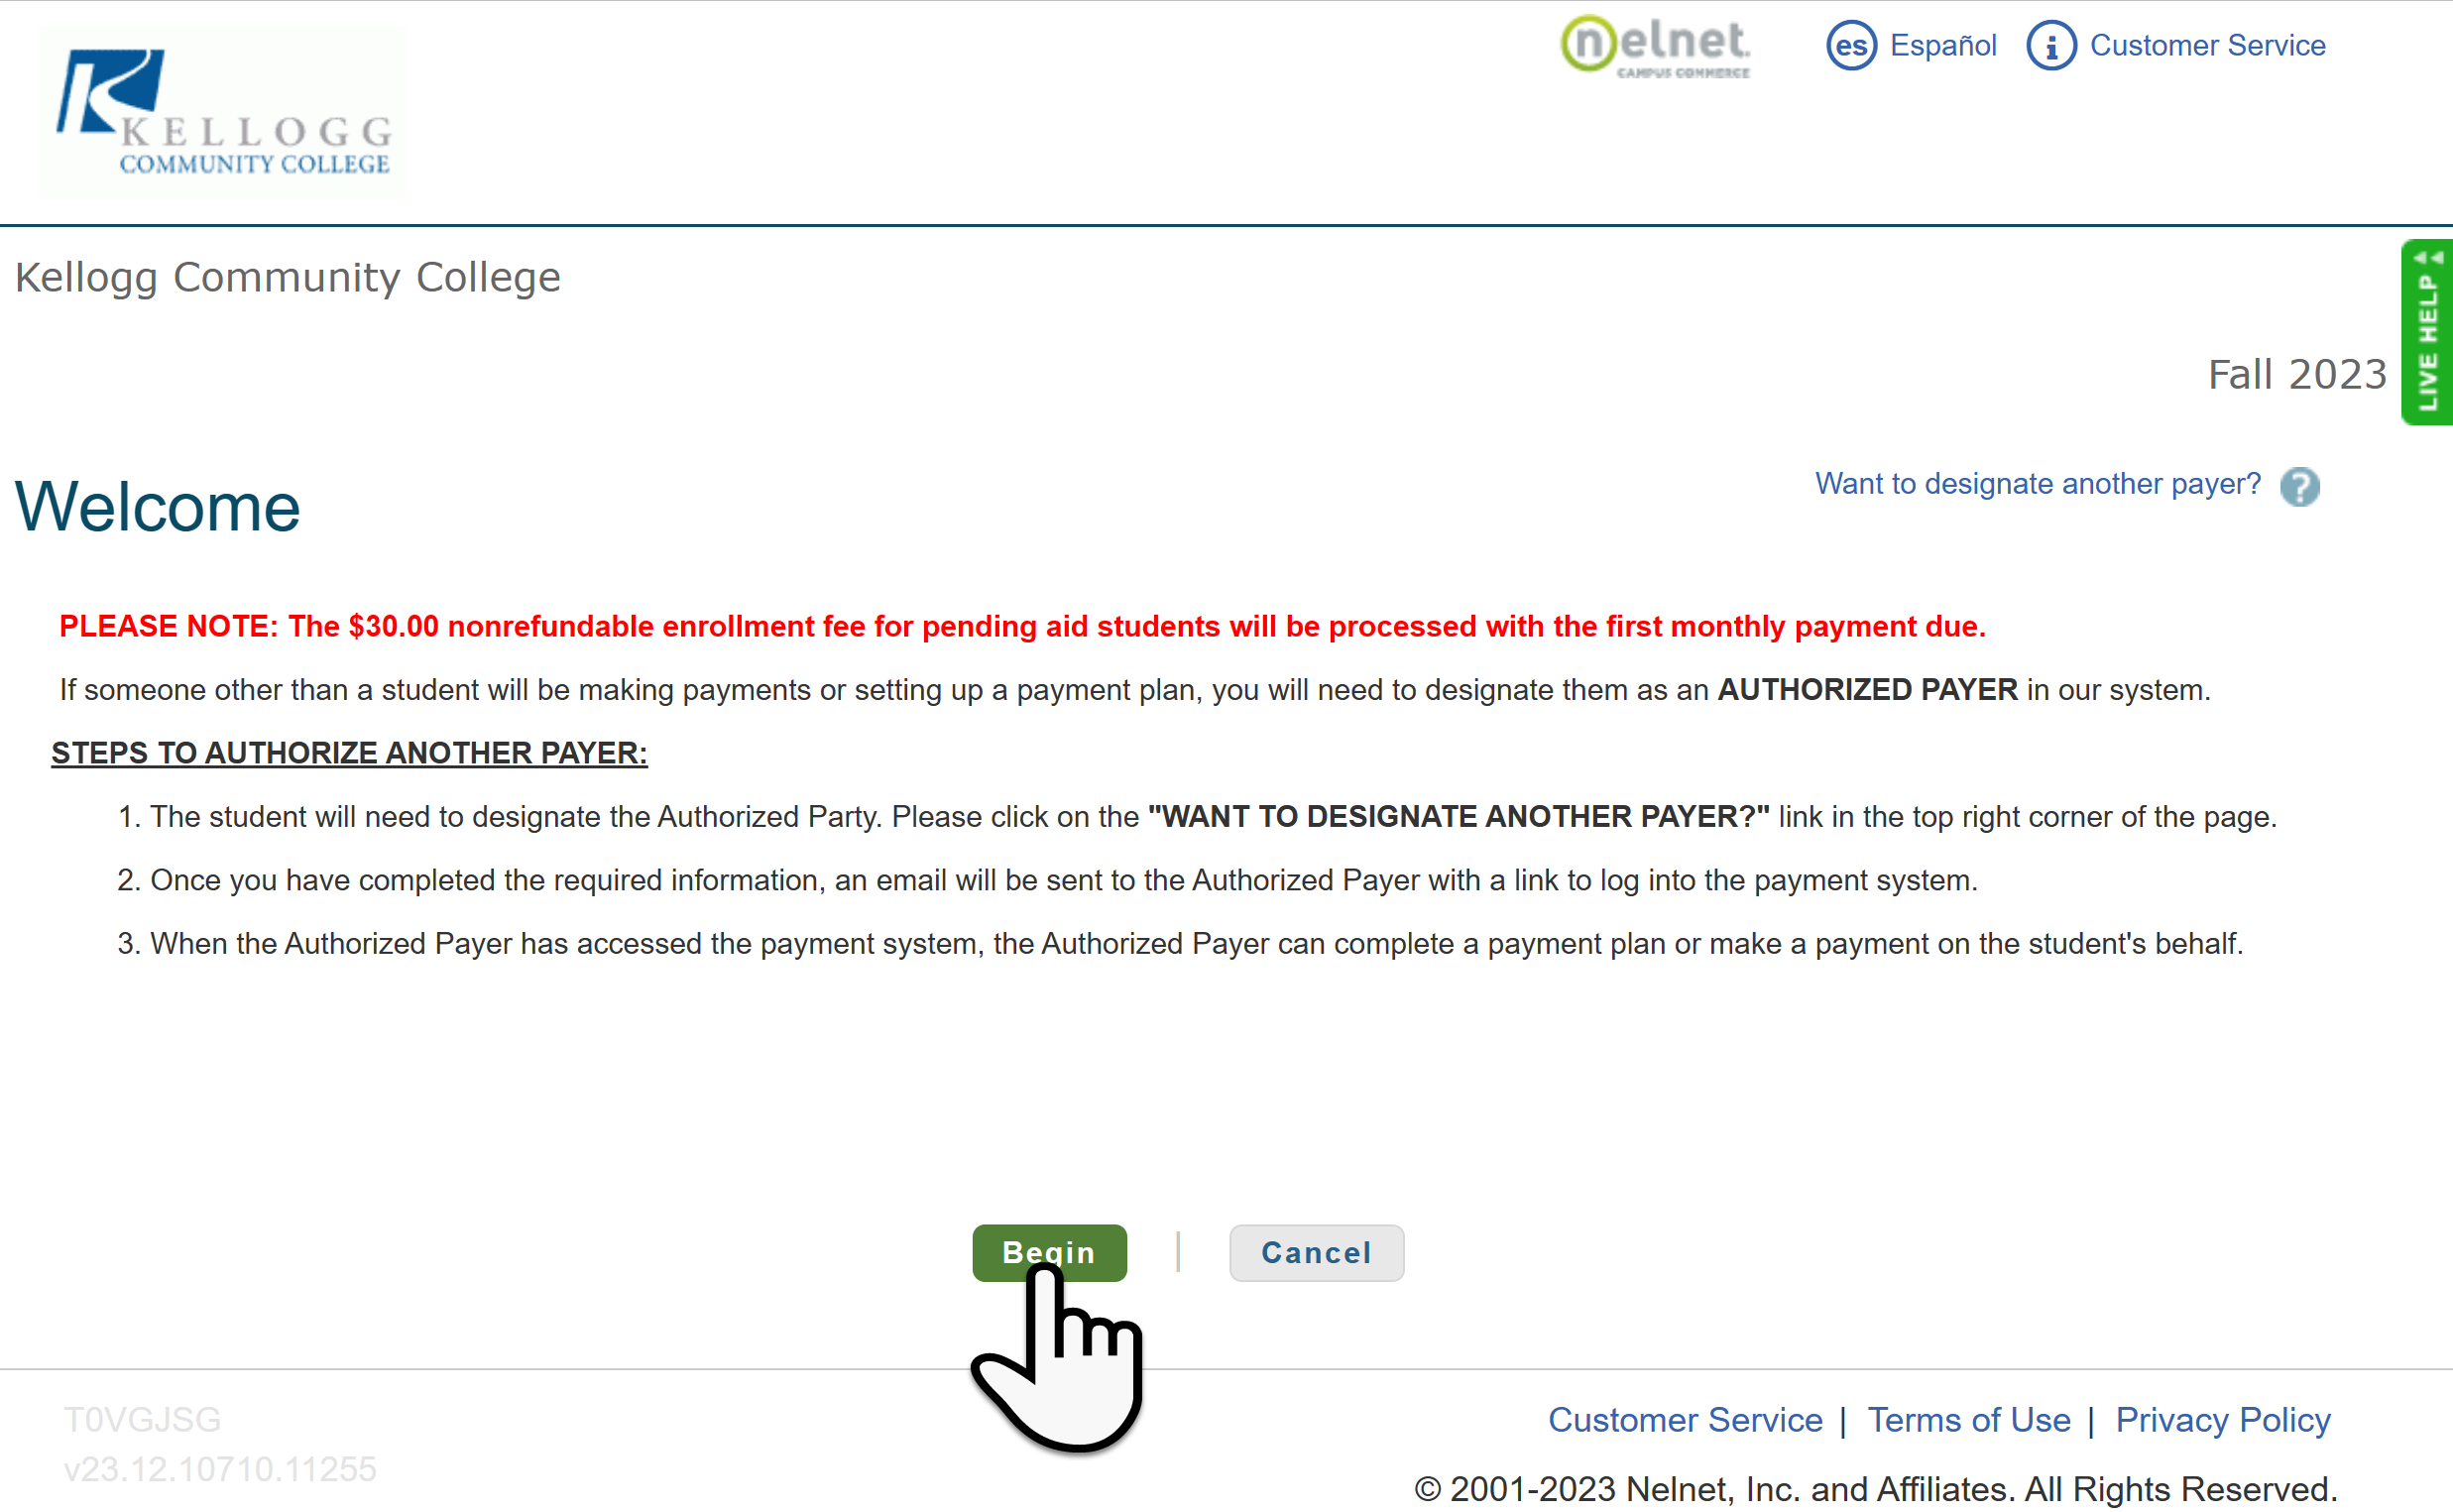
Step 6: Click on Begin after reading the page. Pending Aid payment plans will have a non-refundable enrollment due with the first monthly payment. (Financial Aid Students will not pay the $30.00 fee IF their Financial Aid covers their entire balance).
You may set up an Authorized payer at the top right of the screen. Once your required information has been completed, you will send the Authorized payer an email with a link to login and finish the payment plan.
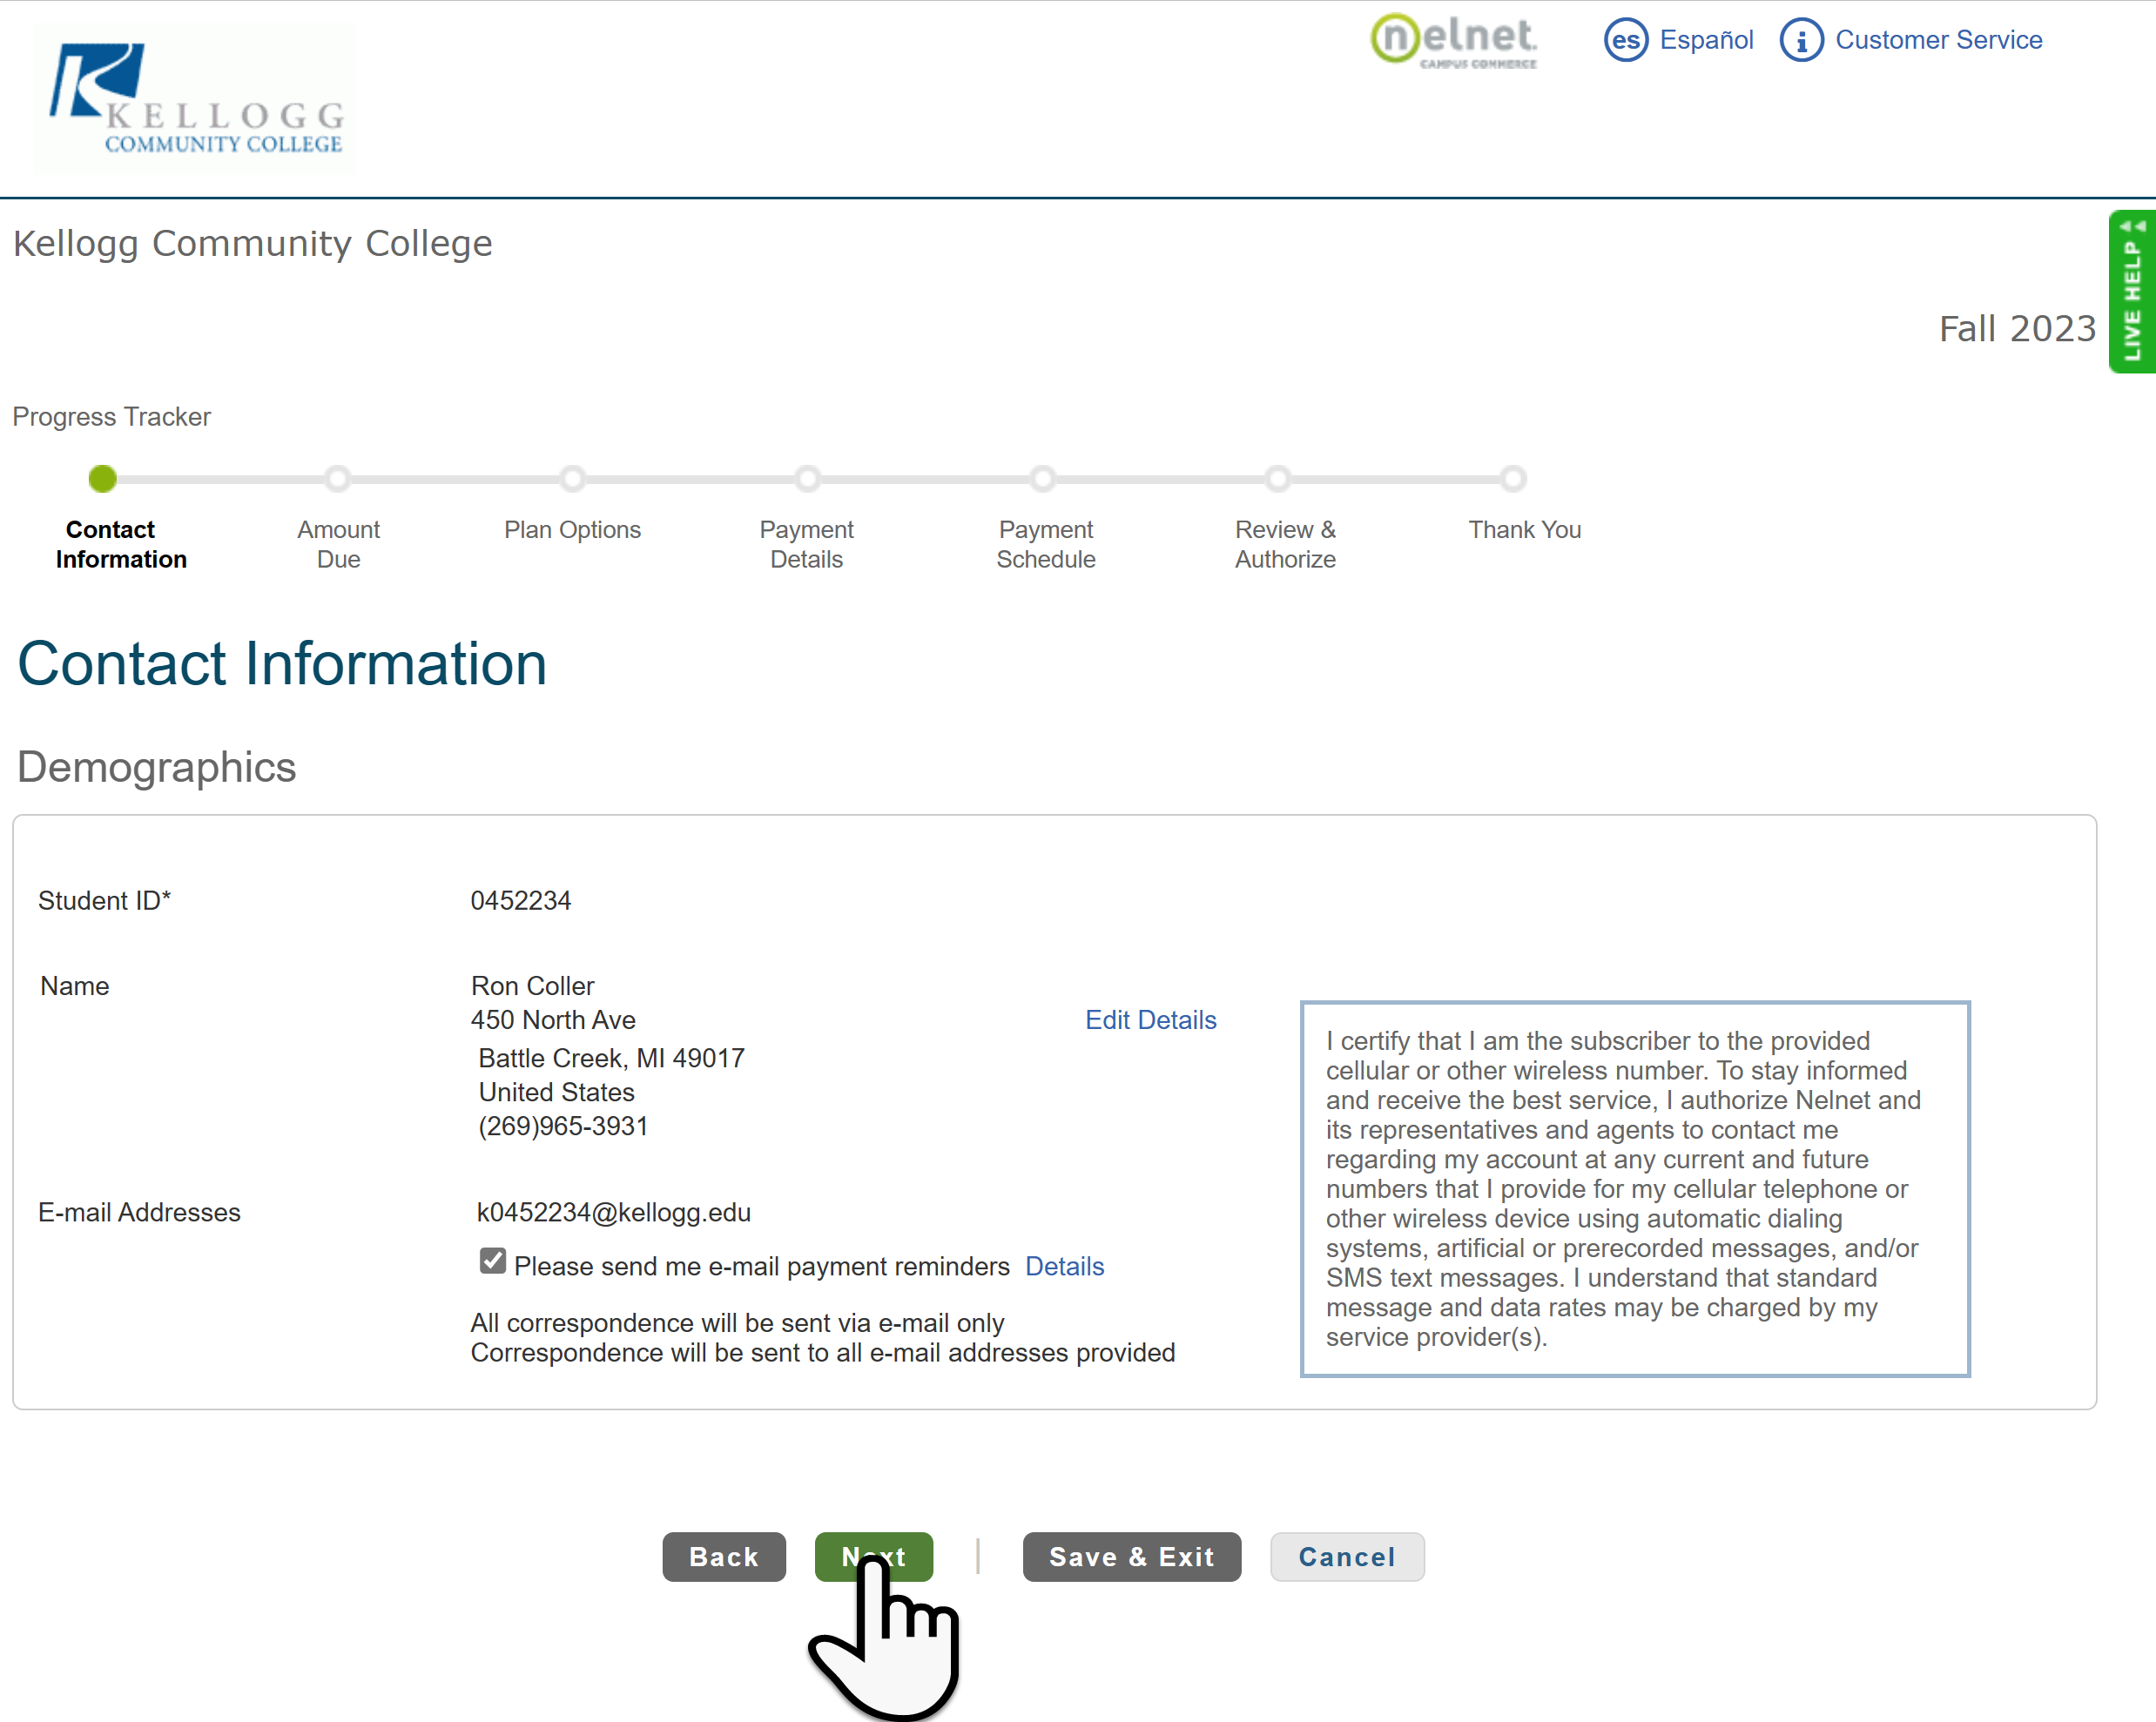
Step 7: Verify your Contact Information, you have the option to edit your address. Option to receive email reminders for upcoming payments. Click on Next to continue.
Step 8: Click View Details to see all the charges for the course, some will have lab fees, technology fees and student service fees or any combination of the three. Otherwise click Next at the bottom of the screen.
Step 9: Choose your Payment Options, this will allow a couple different options. Please choose the one that best fits your needs. Verify the payment details , click on Next, then Agree to the non-refundable Enrollment fees.
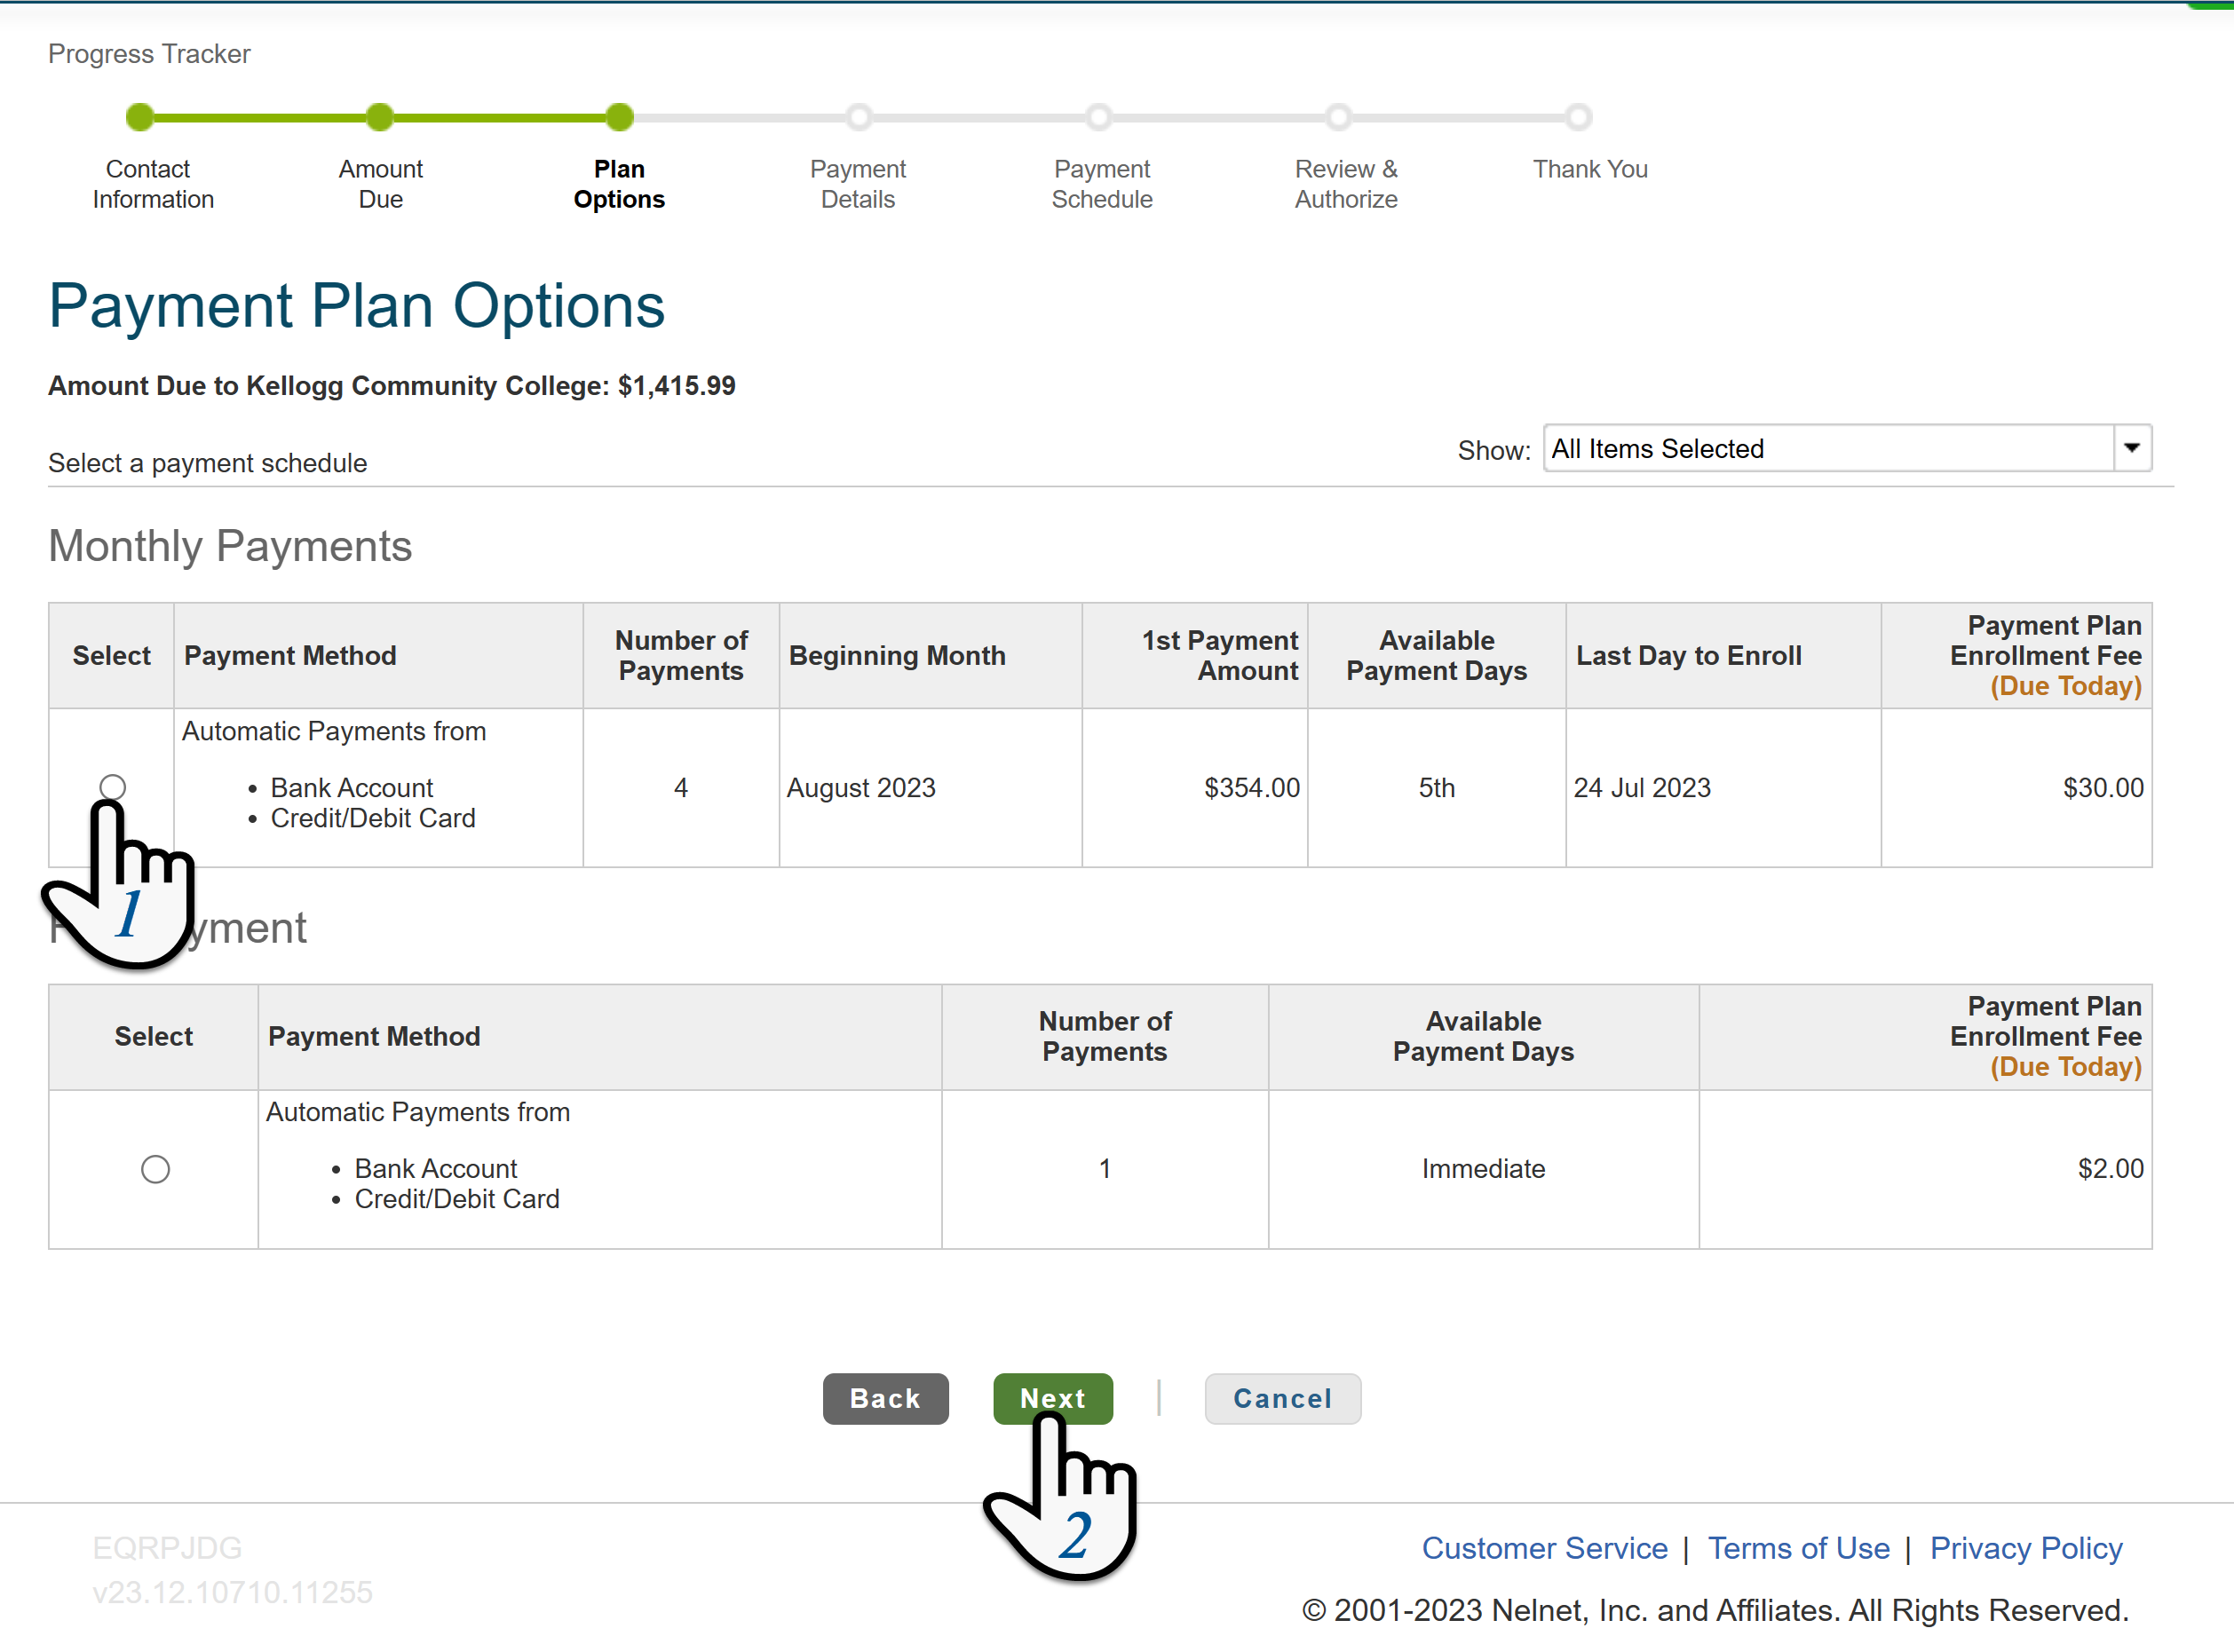
9A: There is a non-refundable payment plan enrollment fee to participate in the option you selected, click Ok to continue.

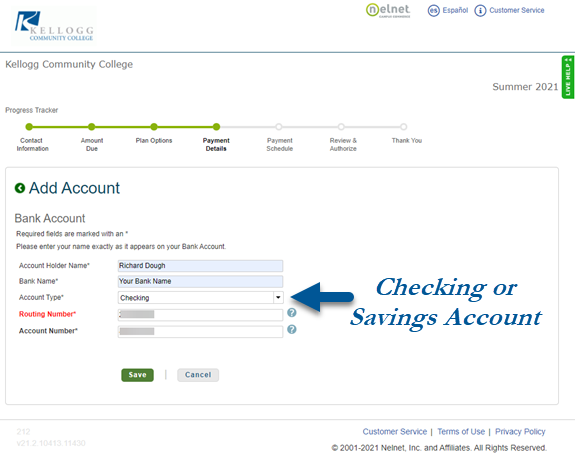
9B: Bank or Credit Card: Verify your payment details and choose either Credit Card or Bank Account.
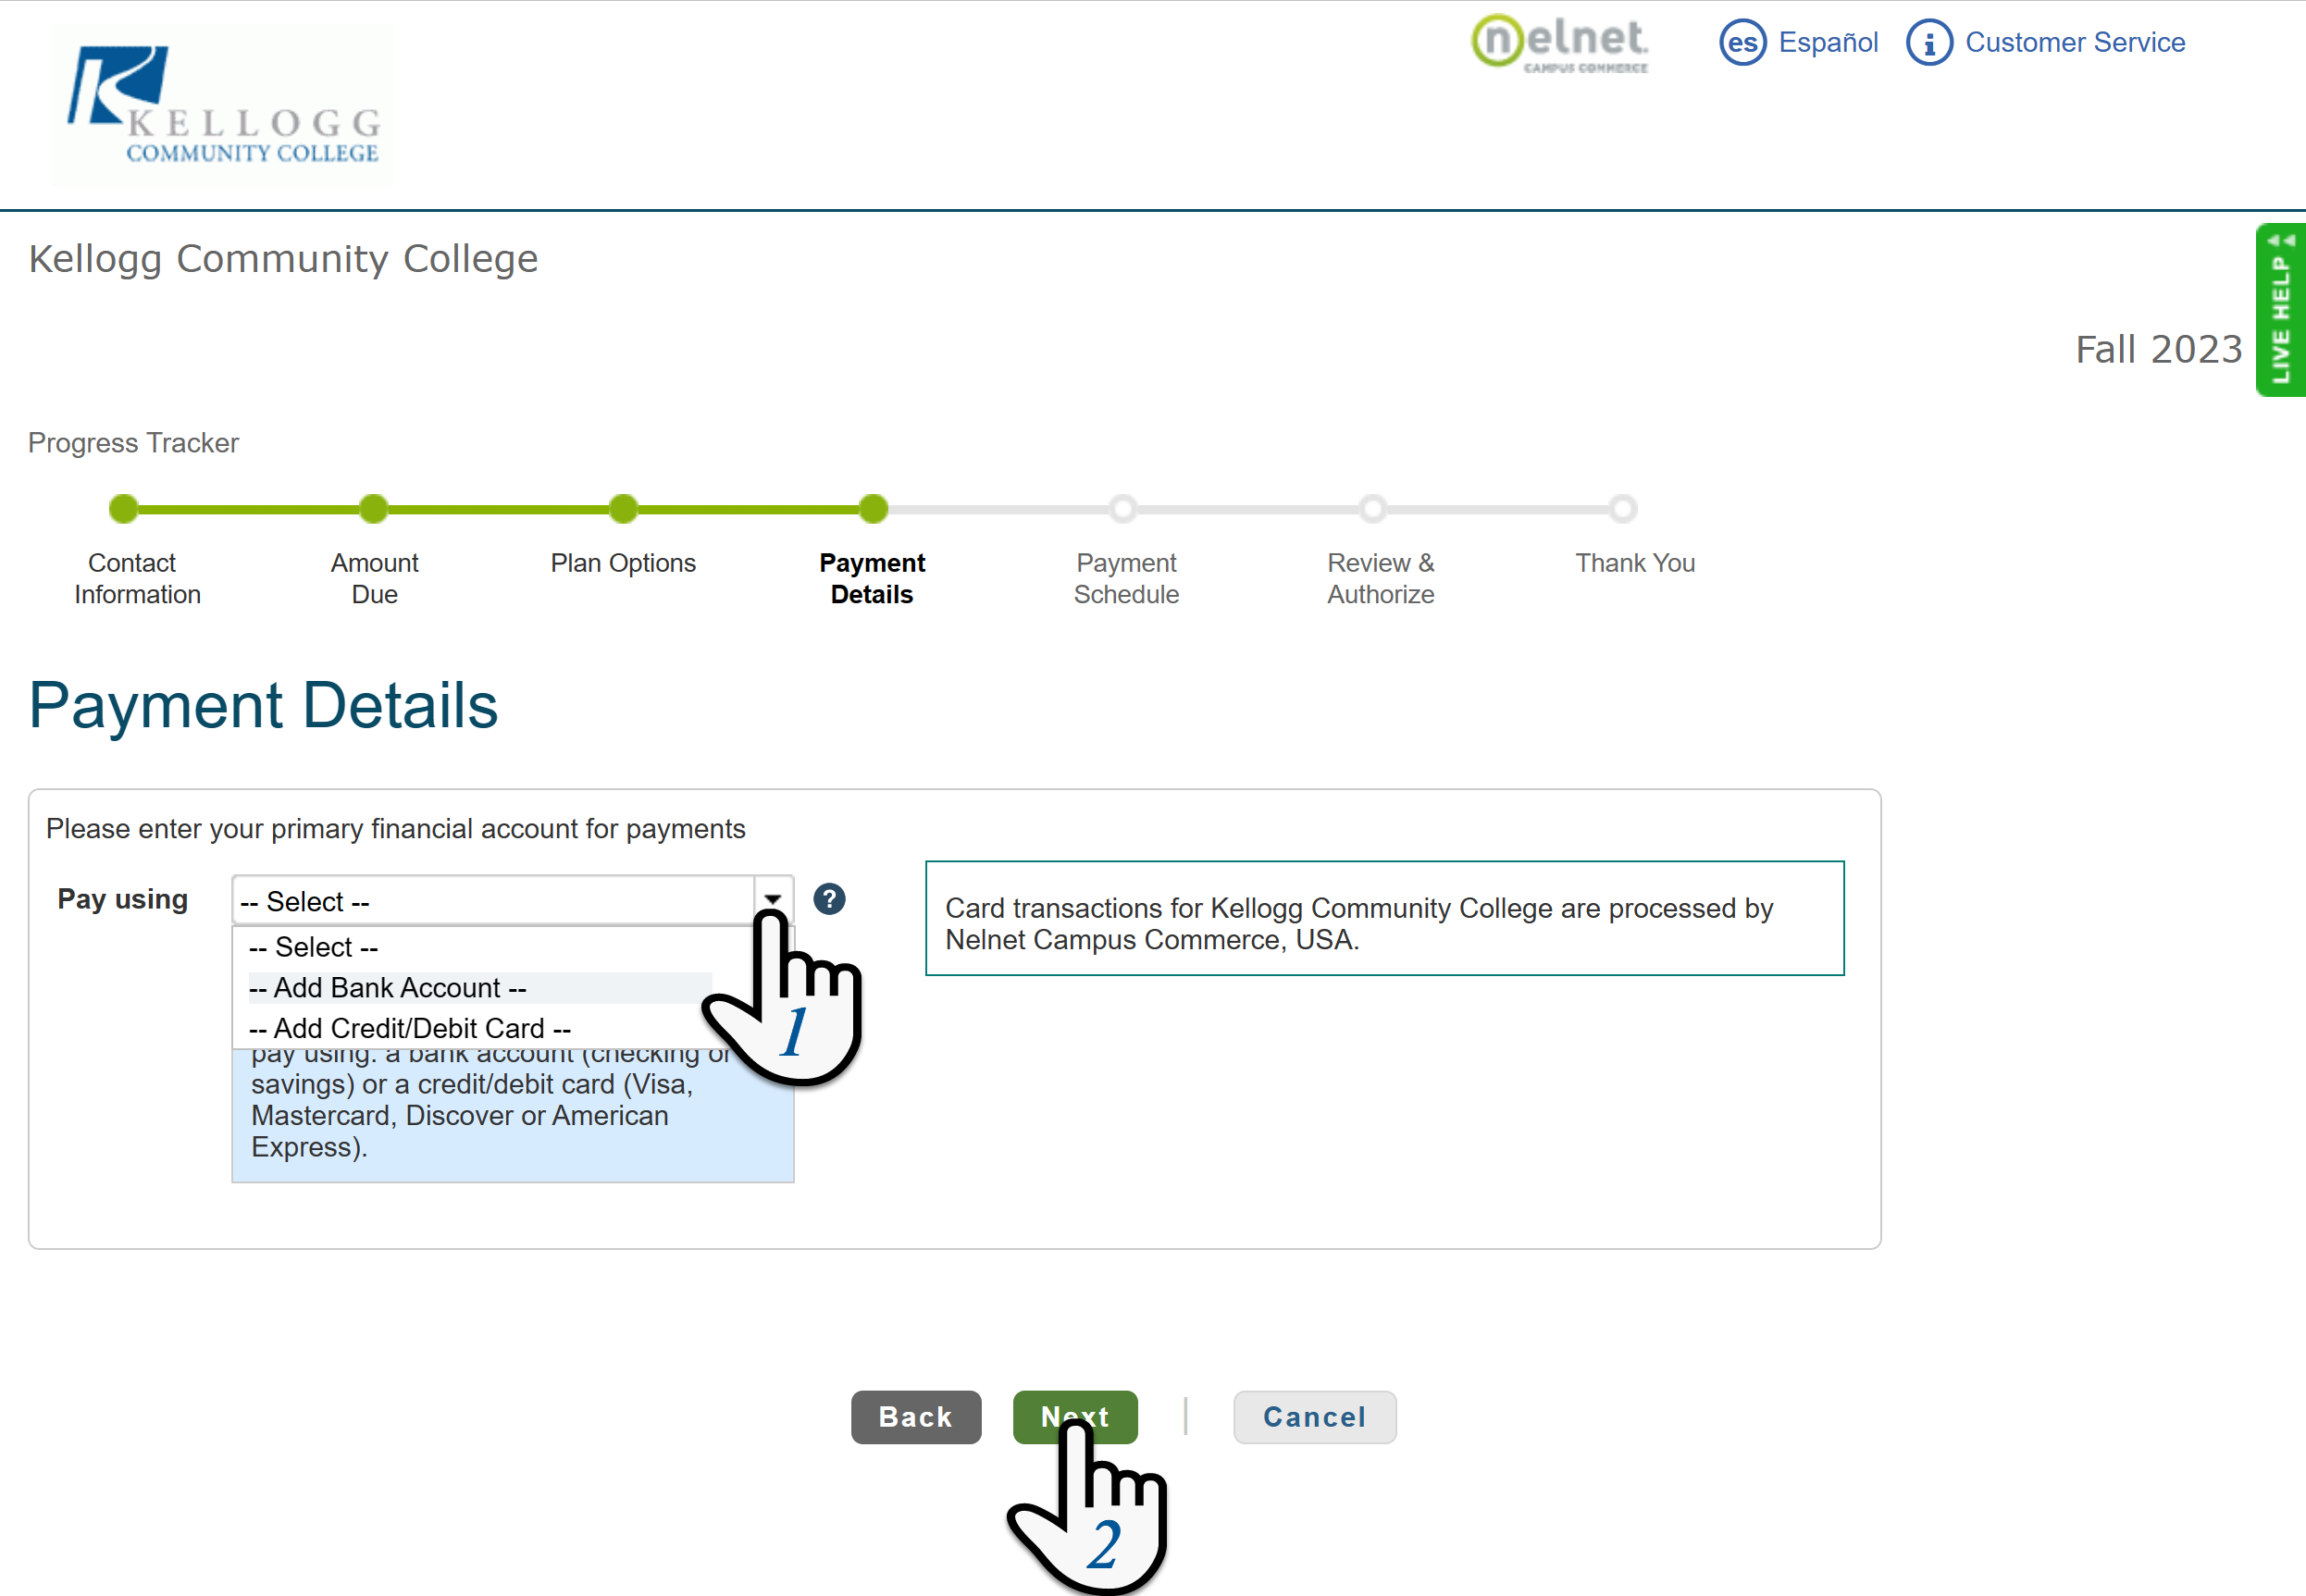
Credit Card Payment Plan: Enter your Credit Card information click Next when finished.
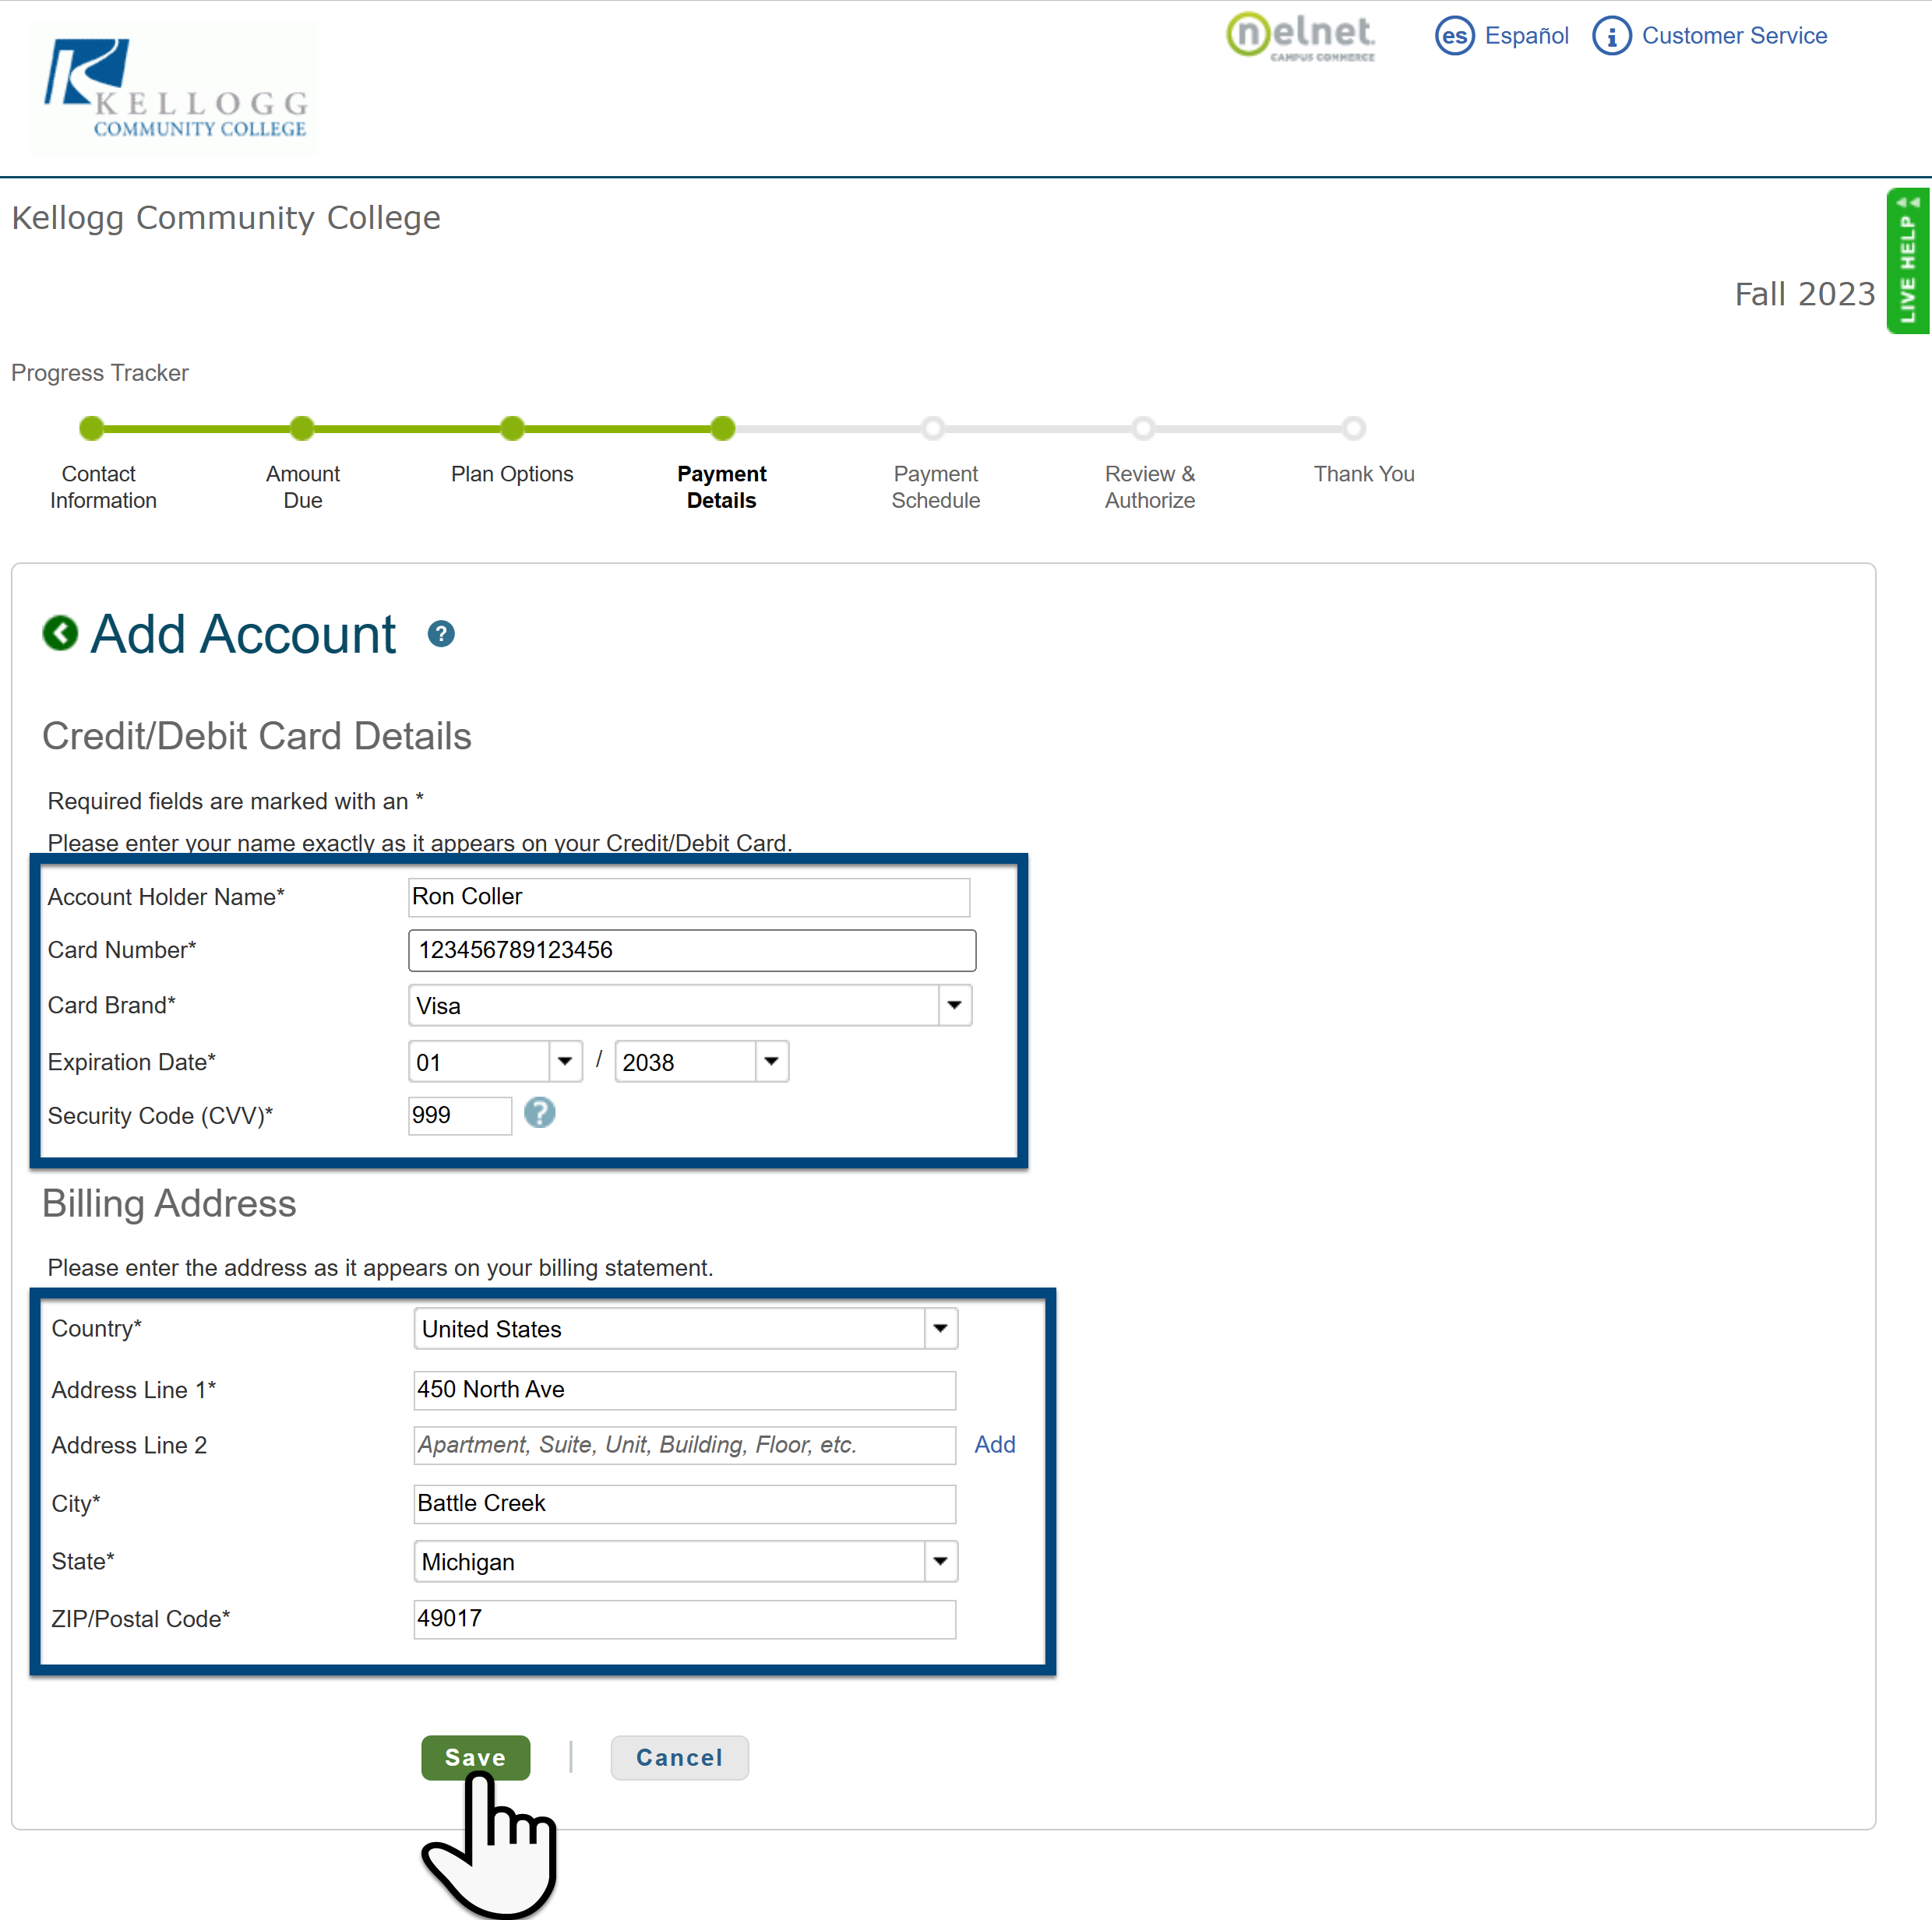
Bank Account Payment Plan: Enter your Bank Account information click Next when finished.
Step 10: Review the Future Payment Schedule, click Next to continue.

Step 11: Review and Accept the Terms and Conditions (located below) and finally click Authorize. It is a good idea to save or print your authorization number and keep for your records.
