Log into the Bruin Portal, click on Employee and finally on Time entry
 You should see a line for each week or payroll period.

Click on the right pointing arrow to open the weeks' timecard
Click Apply to have the timecard fill in with your regular hours

To make changes, click the Additional Time: button

Choose the appropriate Earn Type from the drop down list
Enter the appropriate number of hours under the appropriate day/date
Remove the appropriate number of hours from the Regular Earnings line to correspond with the entry in the previous step.
For Example: If you regularly work 8 hours per day, but you are taking 4 hours of vacation leave, your entry would look like this:

If you are taking he whole day as vacation, your entry would look like this:

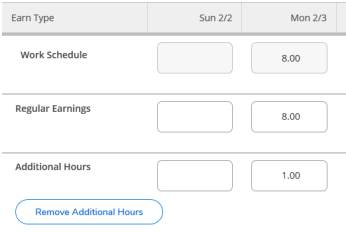
If you work additional hours, choose Additional Hours from the drop down list and enter the appropriate number of hours under the appropriate day/date. Be sure to include your regular hours i the Regular Earnings line. For Example:

To get the second weeks' timecard, click the right pointing arrow next to the dates for the first weeks' timecard.

When your timecard is ready to be sent to the supervisor for approval, just click the Submit for Approval button at the bottom of the screen.

If you discover an error after you have submitted your timecard for approval, you can un-submit it to make corrections as long as the supervisor has not yet approved, and it is before Noon on the Monday due date.
Log back into the Bruin Portal > Employee > Time Entry (make sure you click on the paper icon with the green writing)
Click the right pointing arrow for the timecard that needs to be un-submitted.

Click Return Timecard to Edit
