Microsoft Stream is moving from a standalone video storage, which was limited to only people inside our organization to SharePoint/OneDrive. This is a great update, you will finally be able to share a video outside the KCC Organization.
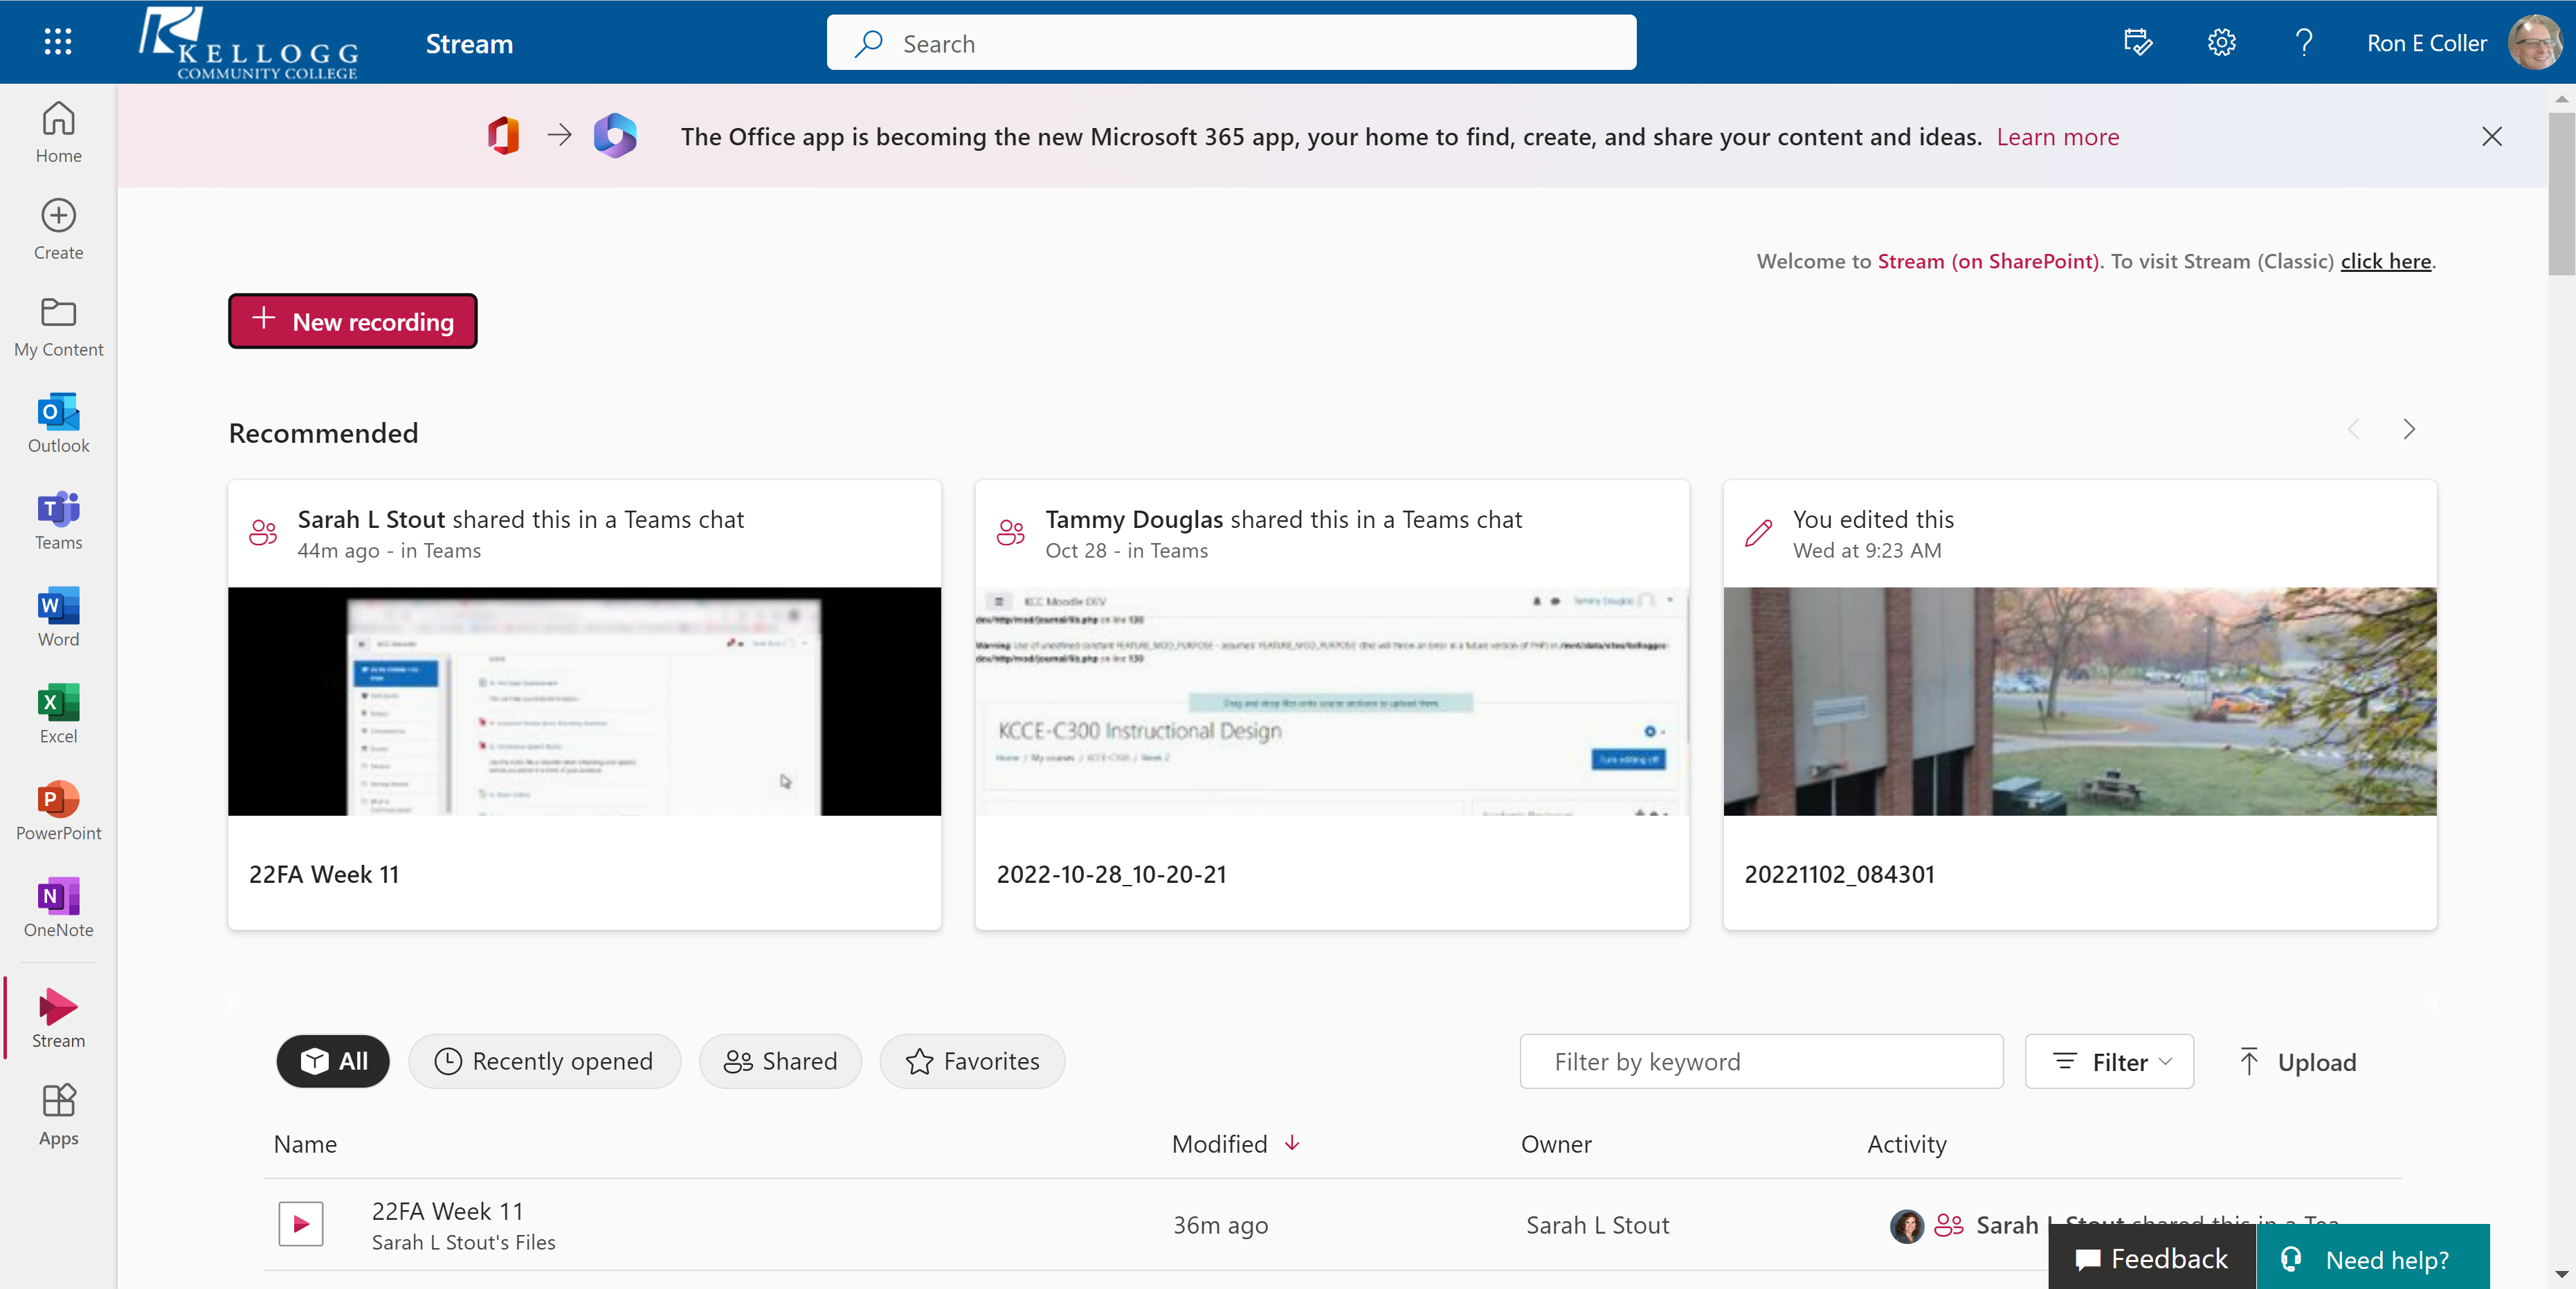
Stream (on SharePoint) Start page

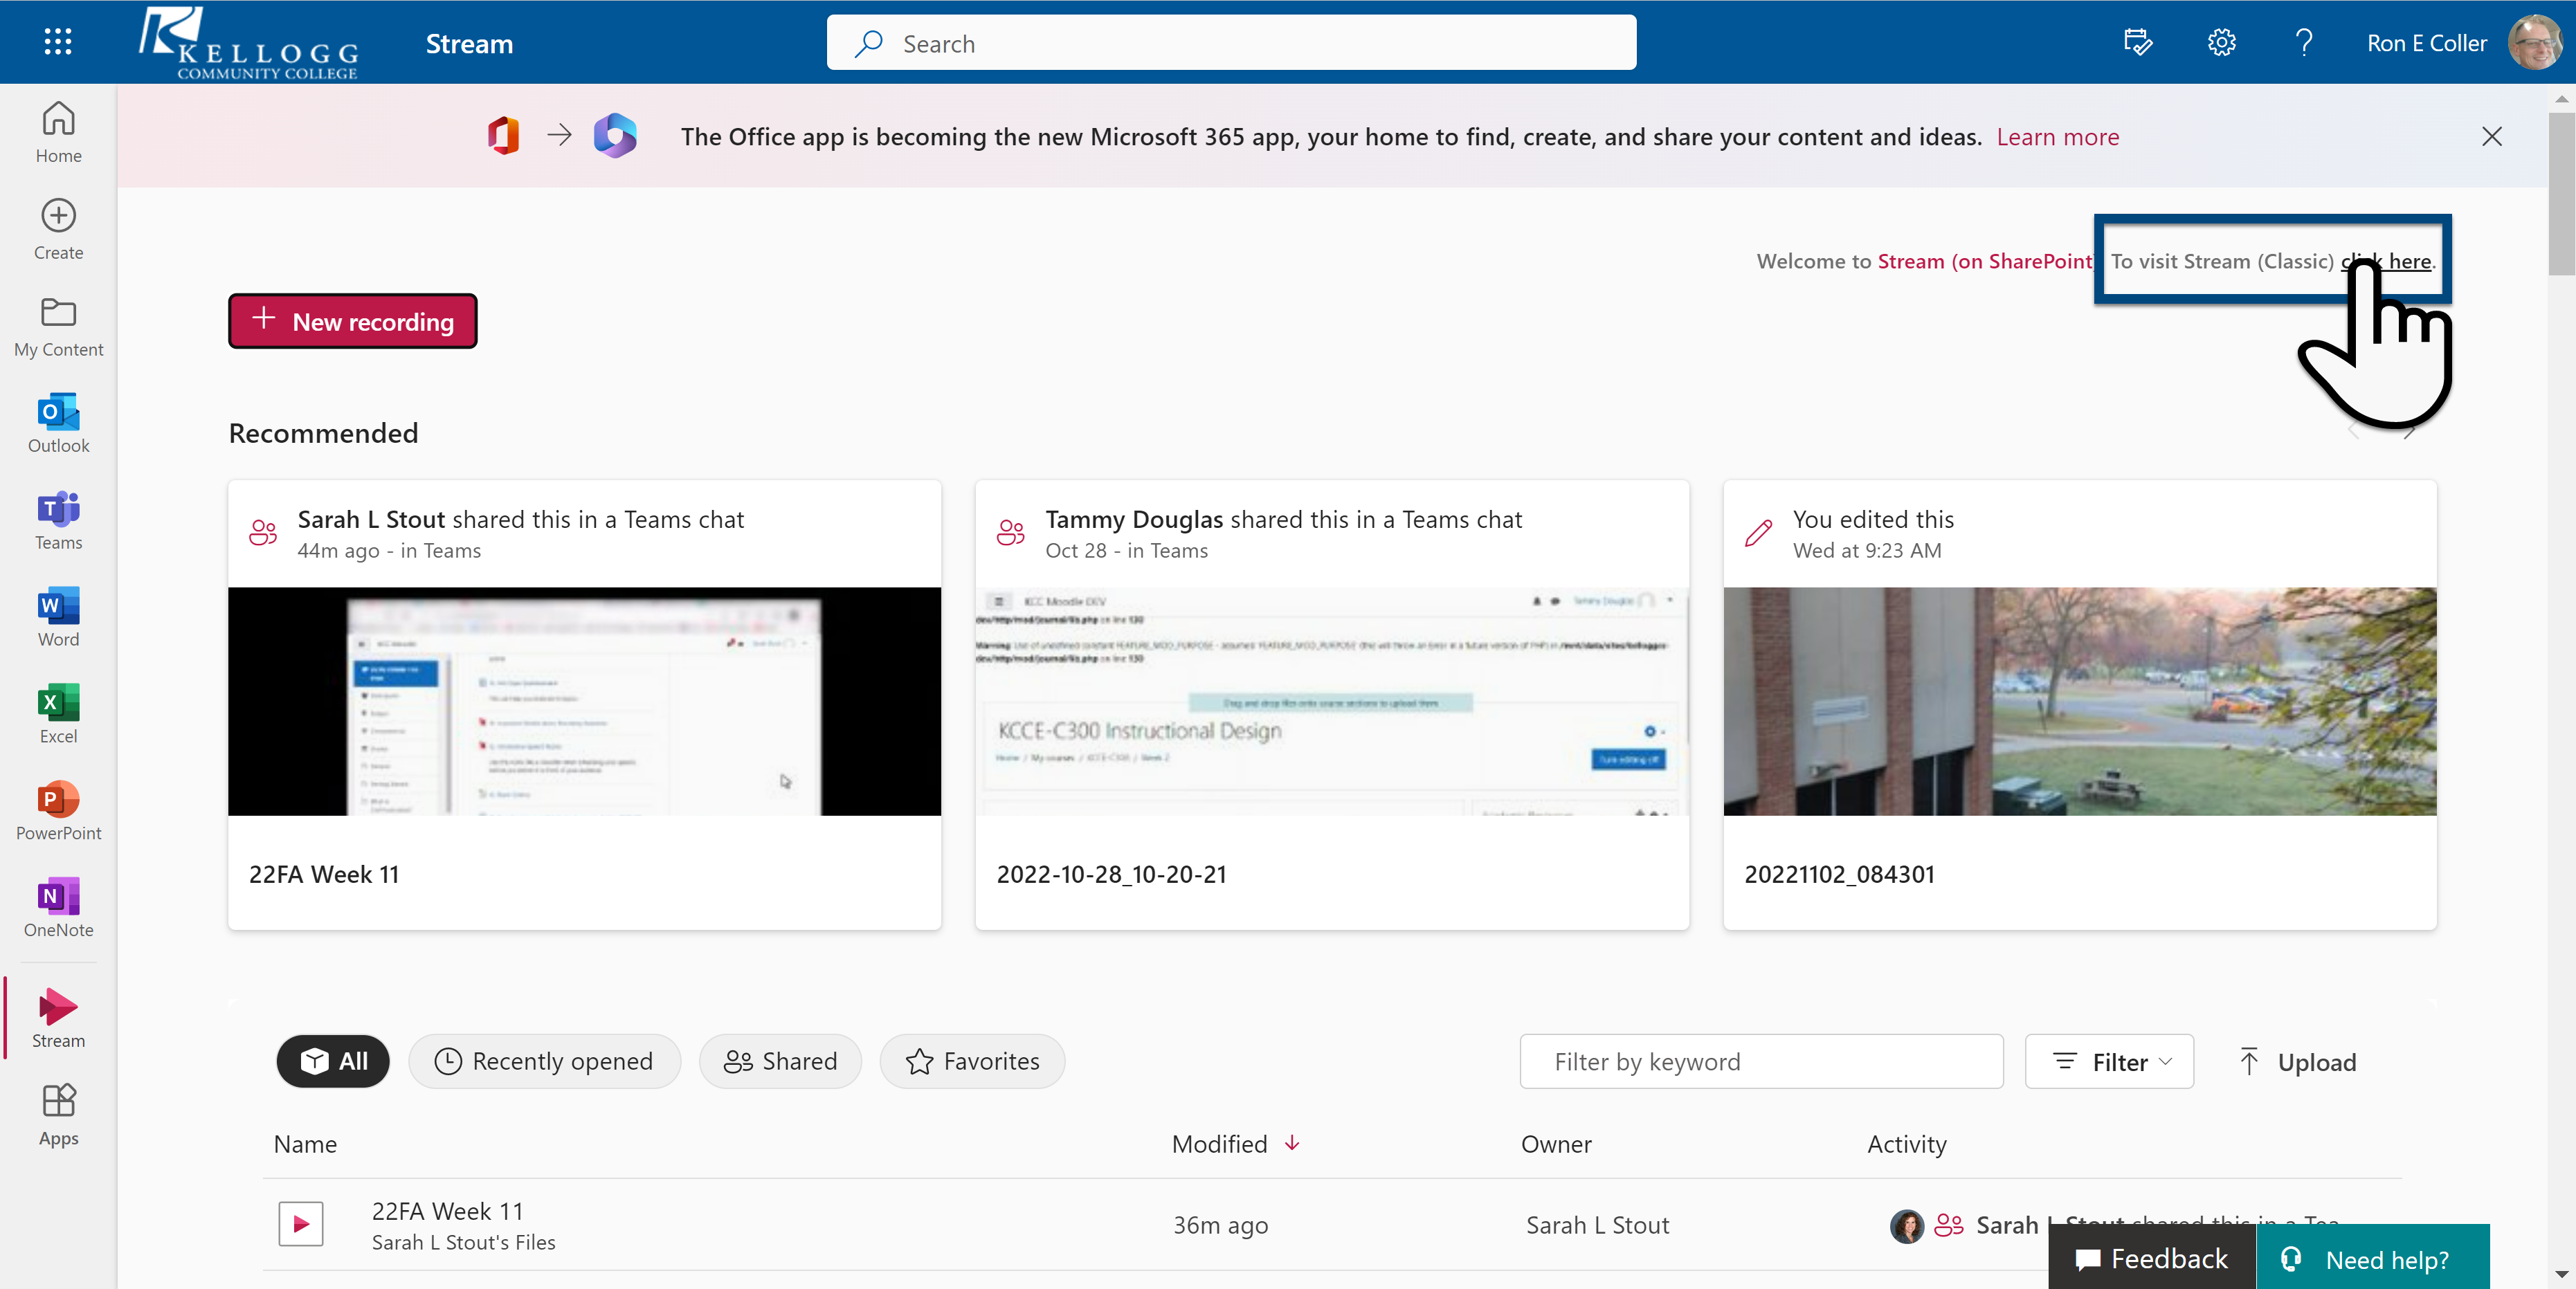
Switch to Stream Classic
If you need to switch back to Classic, at the top right you will see To visit Stream (Classic) click here

Stream (on SharePoint) Upload Videos
There are a few different Options on uploading videos to Stream (on SharePoint)
Option 1: Upload directly to OneDrive (recommended)
OneDrive is the default save location for all Stream (on SharePoint) videos. When uploading to Stream (on SharePoint) it saves it to the top level (a.k.a. root folder) of OneDrive this could cause some organizational issues. I highly recommend going into OneDrive, creating a folder for video's in an organized way. If you think of all your video's for classes making a class folder for each course (BIOL-101 & CHEM-110 & MATH-140 etc.) Combine all your course files in this one folder.
For more help with click here: OneDrive Help
Once logged into OneDrive:
- Click on Upload from the top tool bar
- Select either Files or Folders
- Navigate to the file or folder and select it
- Click on Upload

Option 2 Drag and Drop to Stream (on SharePoint):
From the File explorer, choose the file and with your mouse (left click and hold) drag it from the file explorer to Stream. This will automatically upload to your OneDrive (main folder).

Options 3 Upload button on Stream (on SharePoint)
Located on the right side of the screen click on upload, this will open a file explorer, navigate to the video file you wish to upload and select it and finally click Open

Share Video's
It's simple to share a video or audio file to different groups/people/ inside or outside KCC's organization. Please view “Permissions Link Settings” below to adjust share settings.
Sharing from Stream (on SharePoint) home page:
Once you are logged into Stream, locate the video and click the share icon. Select Email, Copy Link, or Teams. Be sure to adjust the permissions on the video.

Sharing from the Stream (on SharePoint) video:
- Open the video or audio file
- Using your mouse, click on Share and choose your option
- Share - recipients you share with will receive an email with a link to the file.
- Copy link - a link to the file is created, which you can then share however you want, like in a Teams chat, email, or even on a document.
- Copy link at current time - a link to the file is created to the current time in the video or audio file you have open. This link is shareable however you want, like in a chat message or document.
- Embed code - is the HTML code that can be embedded into websites, Moodle, etc...

Sharing from OneDrive
Login to office.com and navigate to OneDrive. Locate the file or folder you wish to share.
- Click the share icon to the right of the file or folder name
- Adjust the permissions on access
- Enter the persons Name or email address
- Option to include a message
- Option to either hit send email or copy link
- If you Copy link, then you can send it through a different method, such as Teams, a document, or email

Permissions/Link Settings
Once you have click the share icon and selected the method of sharing, adjust the permissions on the link
- Anyone with the link - gives access to anyone who receives the link, whether they received it directly from you or forwarded from someone else. This may include people outside the KCC Organization
- People in Kellogg Community College with the link - gives anyone inside the KCC Organization (Anyone with a KCC Email address) who has the link may access it whether it was sent directly to them by you or forwarded from someone else.
- People with existing access - can be used by people who already have access tot he document, file, or folder. It does not change any permissions. Use this if you just want to send a link to someone who already as access. For instance, you emailed it to them a while ago and they cannot seem to find it so you would reshare the link with them.
- Specific people - will only be available to those you have specified, even if one of the individuals shares or forwards it to someone else they will not have access to view the file/video.
Other Link settings:
-
Allow editing - let people who are signed in with a KCC account can edit the files or folders they have access to. If you are sharing a folder, people with Edit permissions can copy, move, edit, rename, share and delete anything in the folder they have access to. Unchecking this box means that people can view, copy, or download your items without signing in. They can also forward the link to other people. However, they cannot make changes to the version on your OneDrive or SharePoint.
- Is turned on by default
- You can set editing permission on the previous screen. Under Send link, next to the Name, group or email field, select the pencil icon to change the editing permissions for the people of groups you have entered.
-
Block download - prevents people from downloading the file or folders they have access to. Unchecking this box means that people can download the files onto their devices.
- this option is only available if you don't allow editing
- Set expiration date - lets you set a date for the link to expire. After the date you set, the link won't work anymore and you will need to create a new link for users requiring access to your file or folder.
-
Set password - lets you set a password to access the file. When a user clicks the link, they will be prompted to end a password before they can access the file.
- You'll need to provide this password separately to anyone you want to share the file with.

Deleting a video file from Stream (on SharePoint)
Once inside of Stream (on SharePoint) navigate to the video you wish to delete which is most likely inside of your OneDrive.
- Click on the three dots (…) for More Options
- Click on the right arrow
- Click on Open File Location
- Using your mouse, click on the three vertical dots
- Click on Delete
Or you can go directly to OneDrive, locate the file and delete using steps 4 and 5 above.

Transcript and Captions
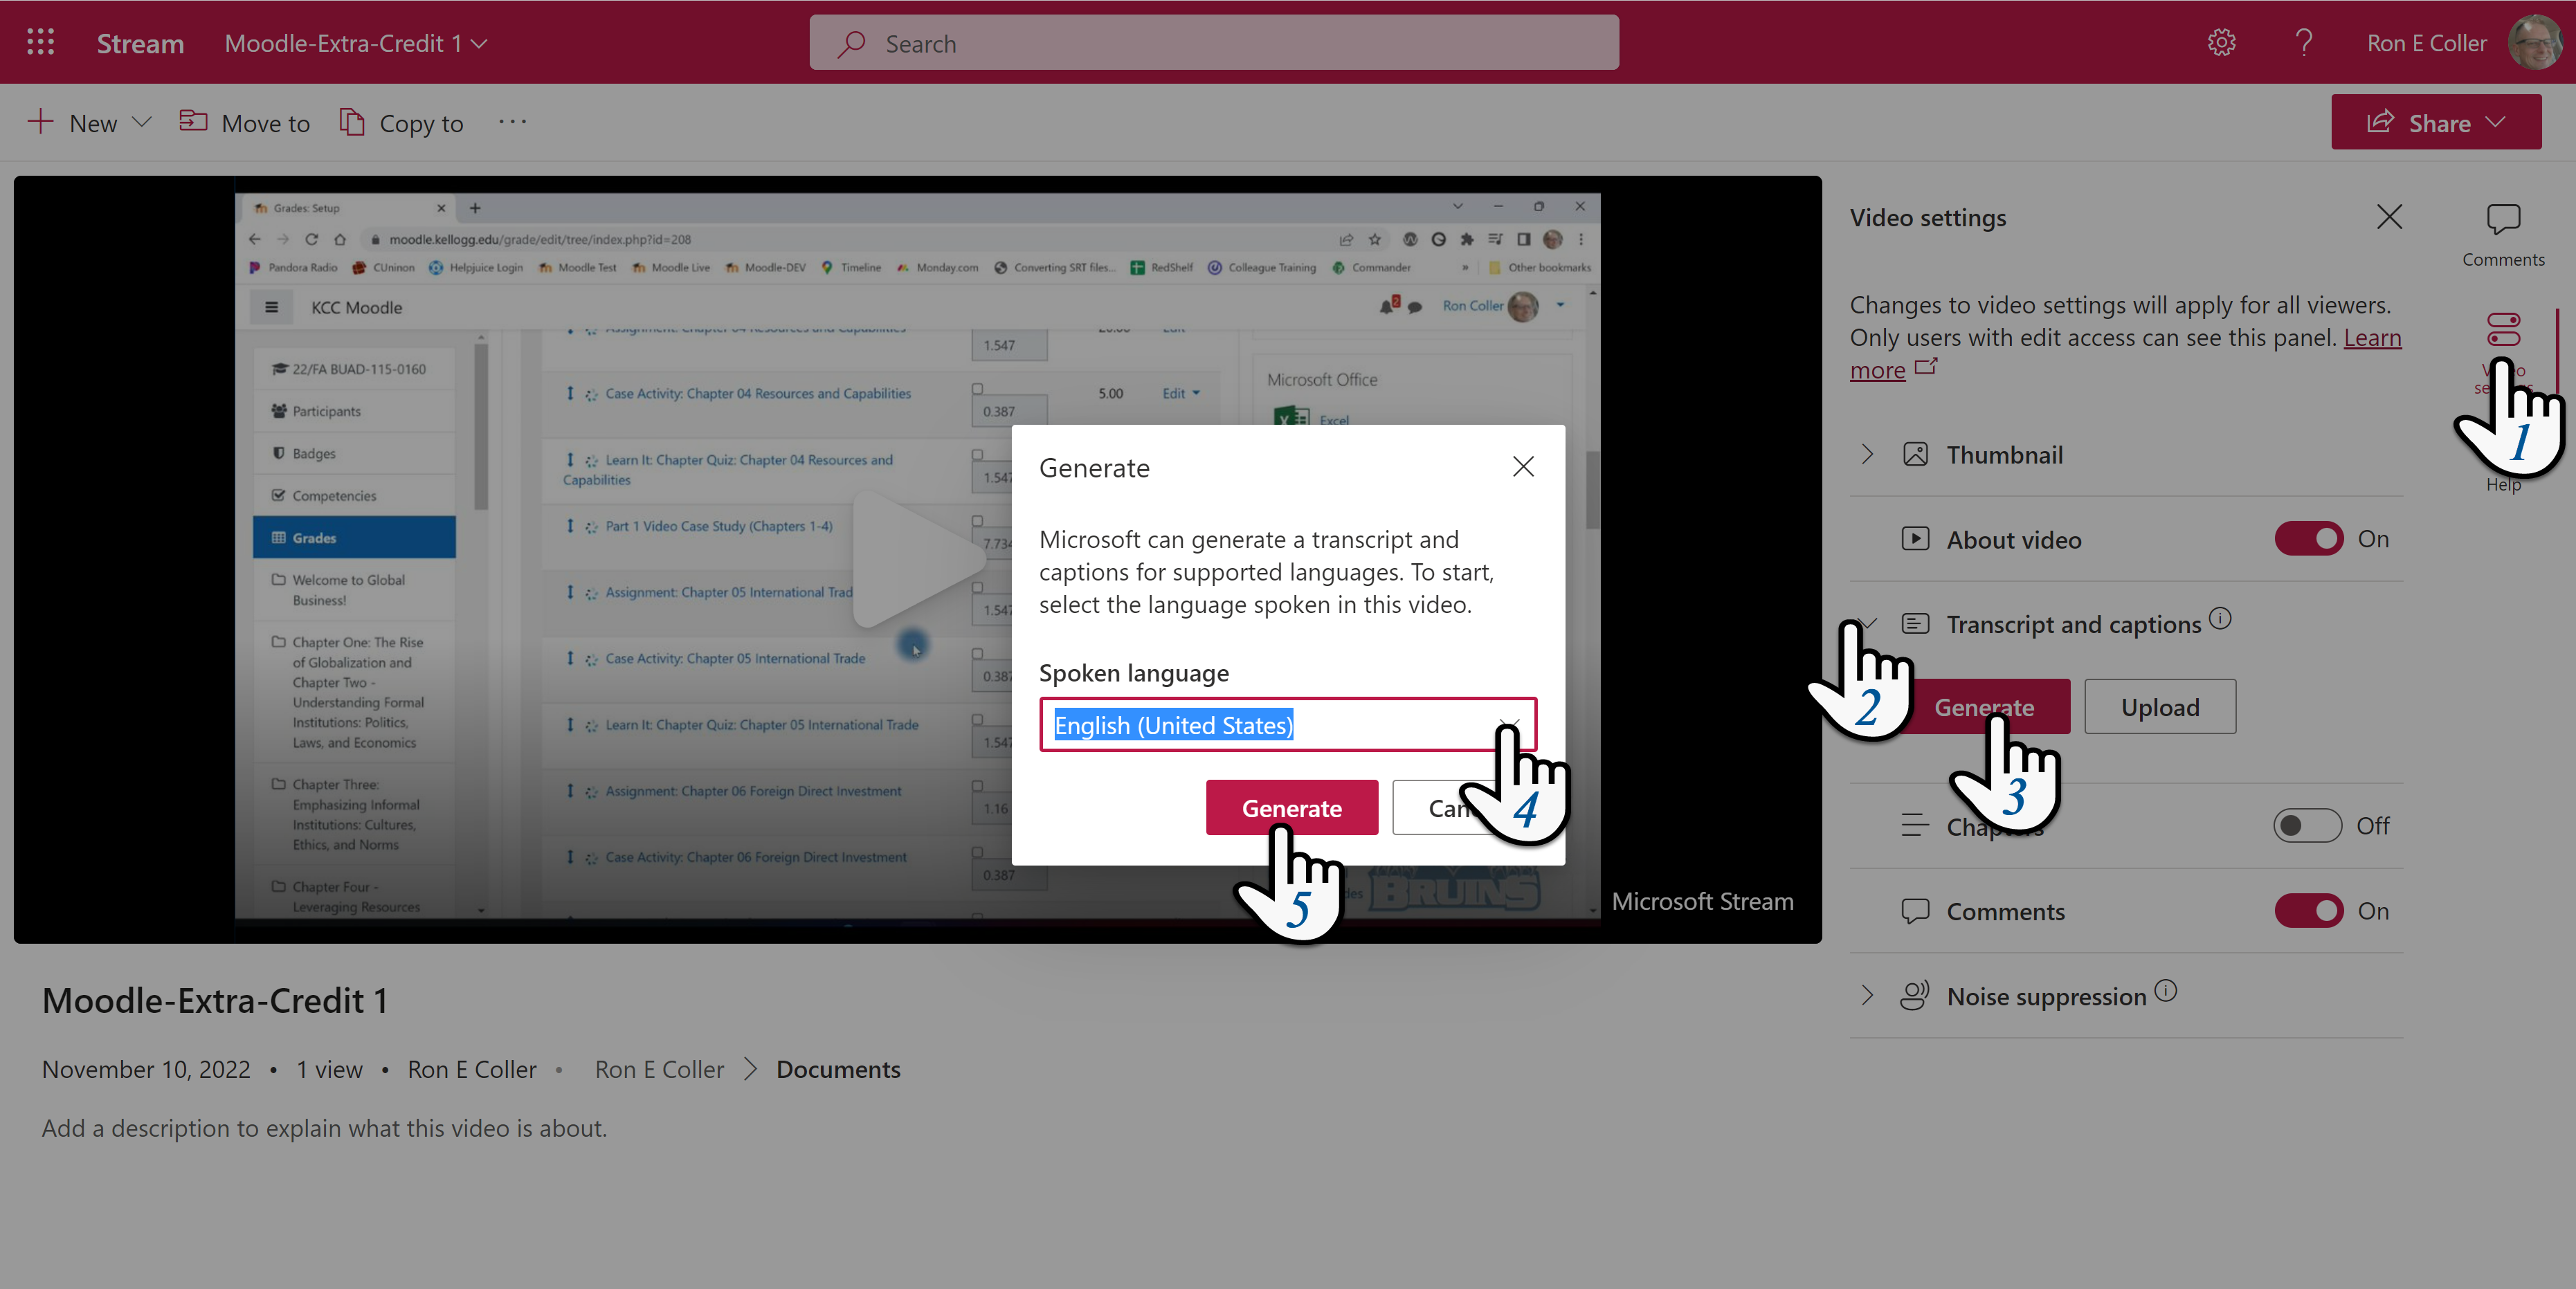
You will want to Generate the captions for your video's. Currently you will have to click a button to generate the transcripts and captions. Microsoft is currently working on automatic captions but is not working on the new Stream (on SharePoint) yet.
- Locate and open the video and click on Video settings
- Expand Transcript and captions
- Click on Generate
- Select the Spoken language from the drop down menu
- Click Generate

Edit Transcripts
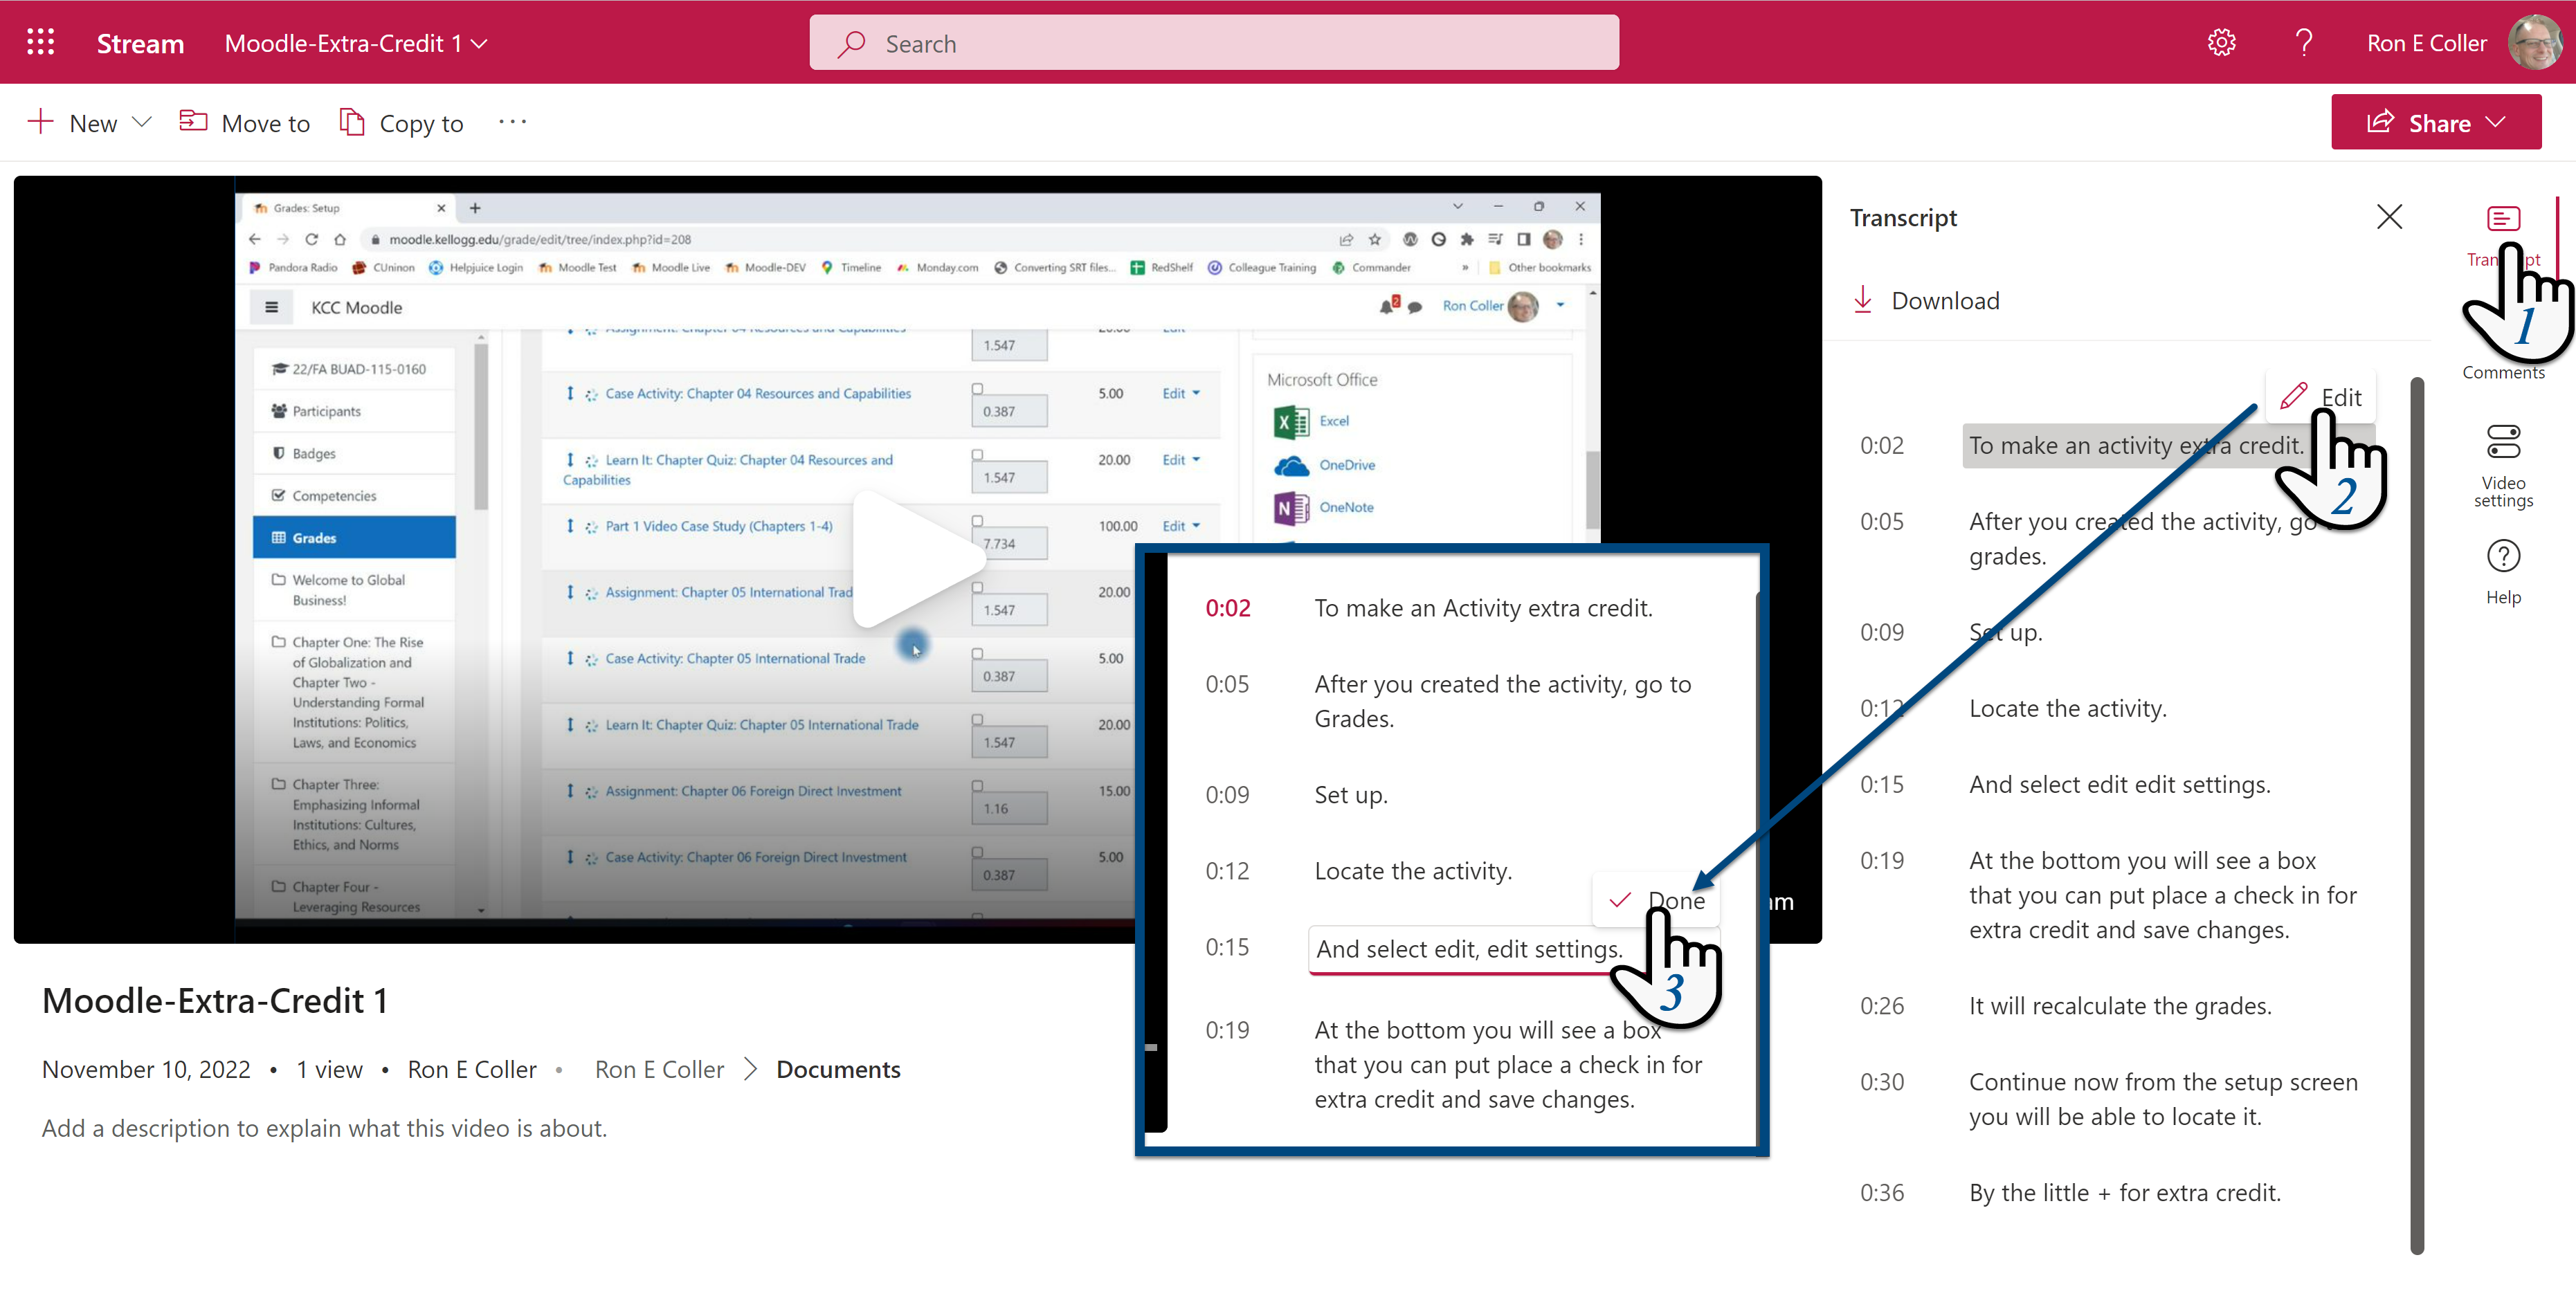
Let's face it, nothing is ever 100% all the time. Although I believe they do a pretty good job with the automatic captions, there is room for improvement.
- Once you have the video opened and have already generated the captions, click on Transcripts
- Locate the error in the transcripts and click Edit
- When you are finished making your edits, click on Done
