
Step 1: Open an internet browser (Chrome, Edge, Firefox, Safari) and go to www.kellogg.edu.

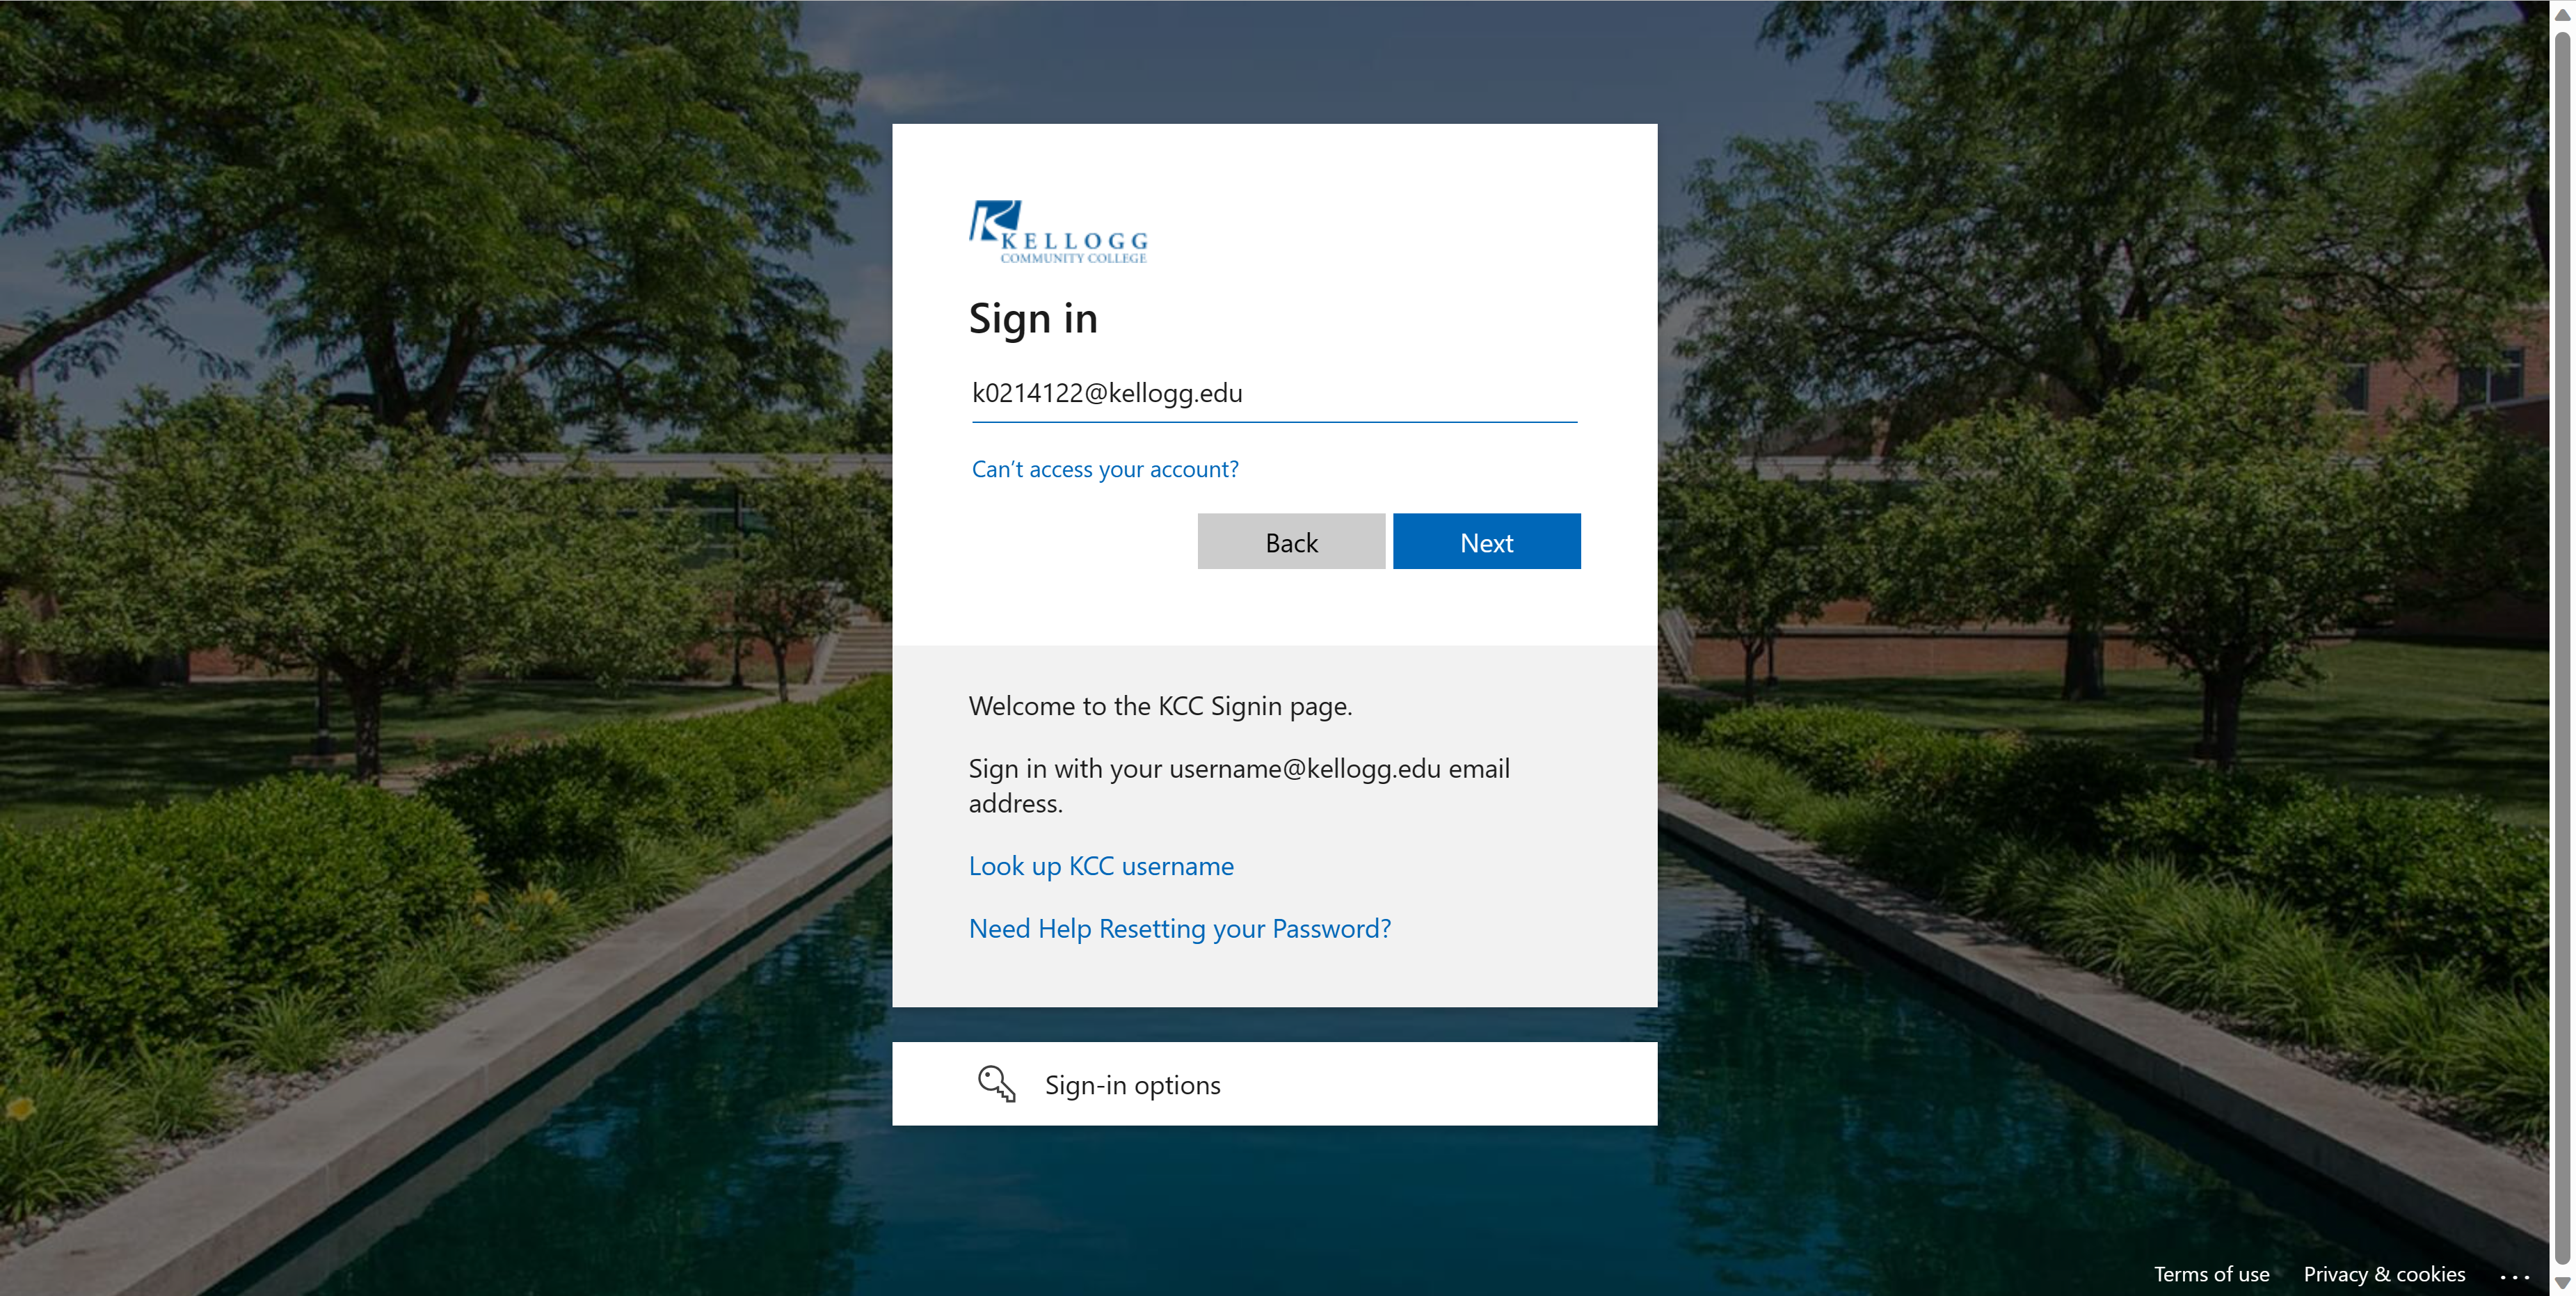
Step 2: Login to the Bruin Portal using your KCC email address and Password.
Step 3: From the Bruin Portal home screen, there are two ways to search for sections.
-
Click on Search for Classes from the web part on the right.
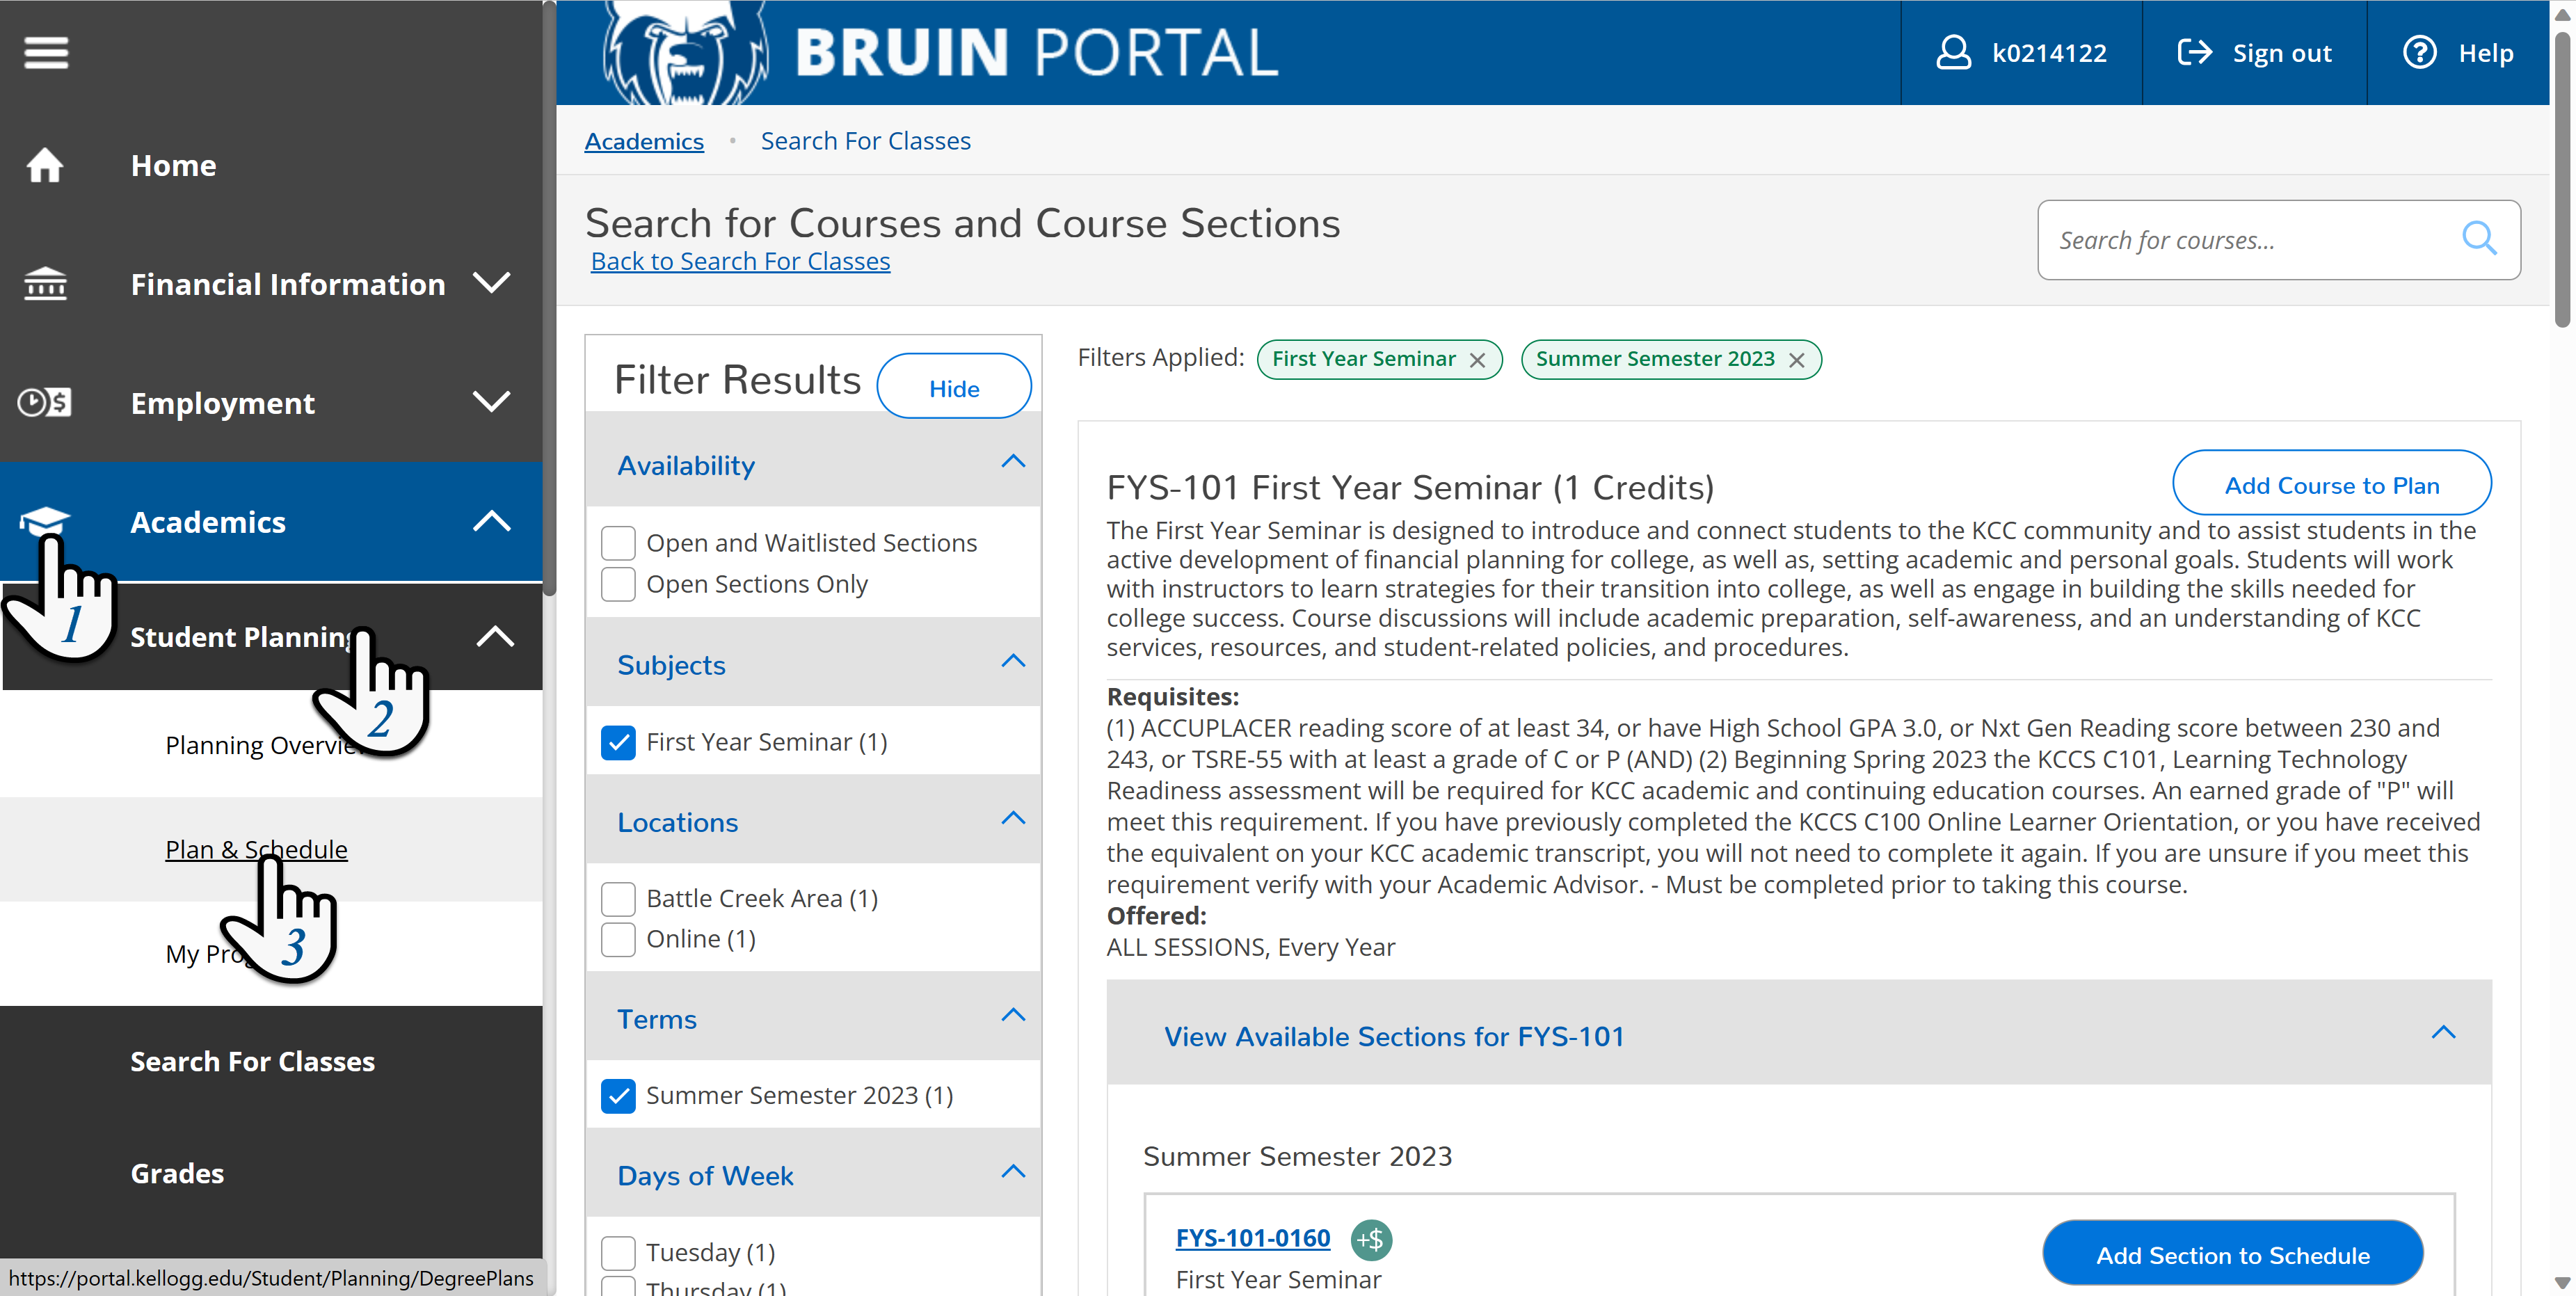
OR - Click on the Academics (graduation cap) and then Search For Classes (2a).
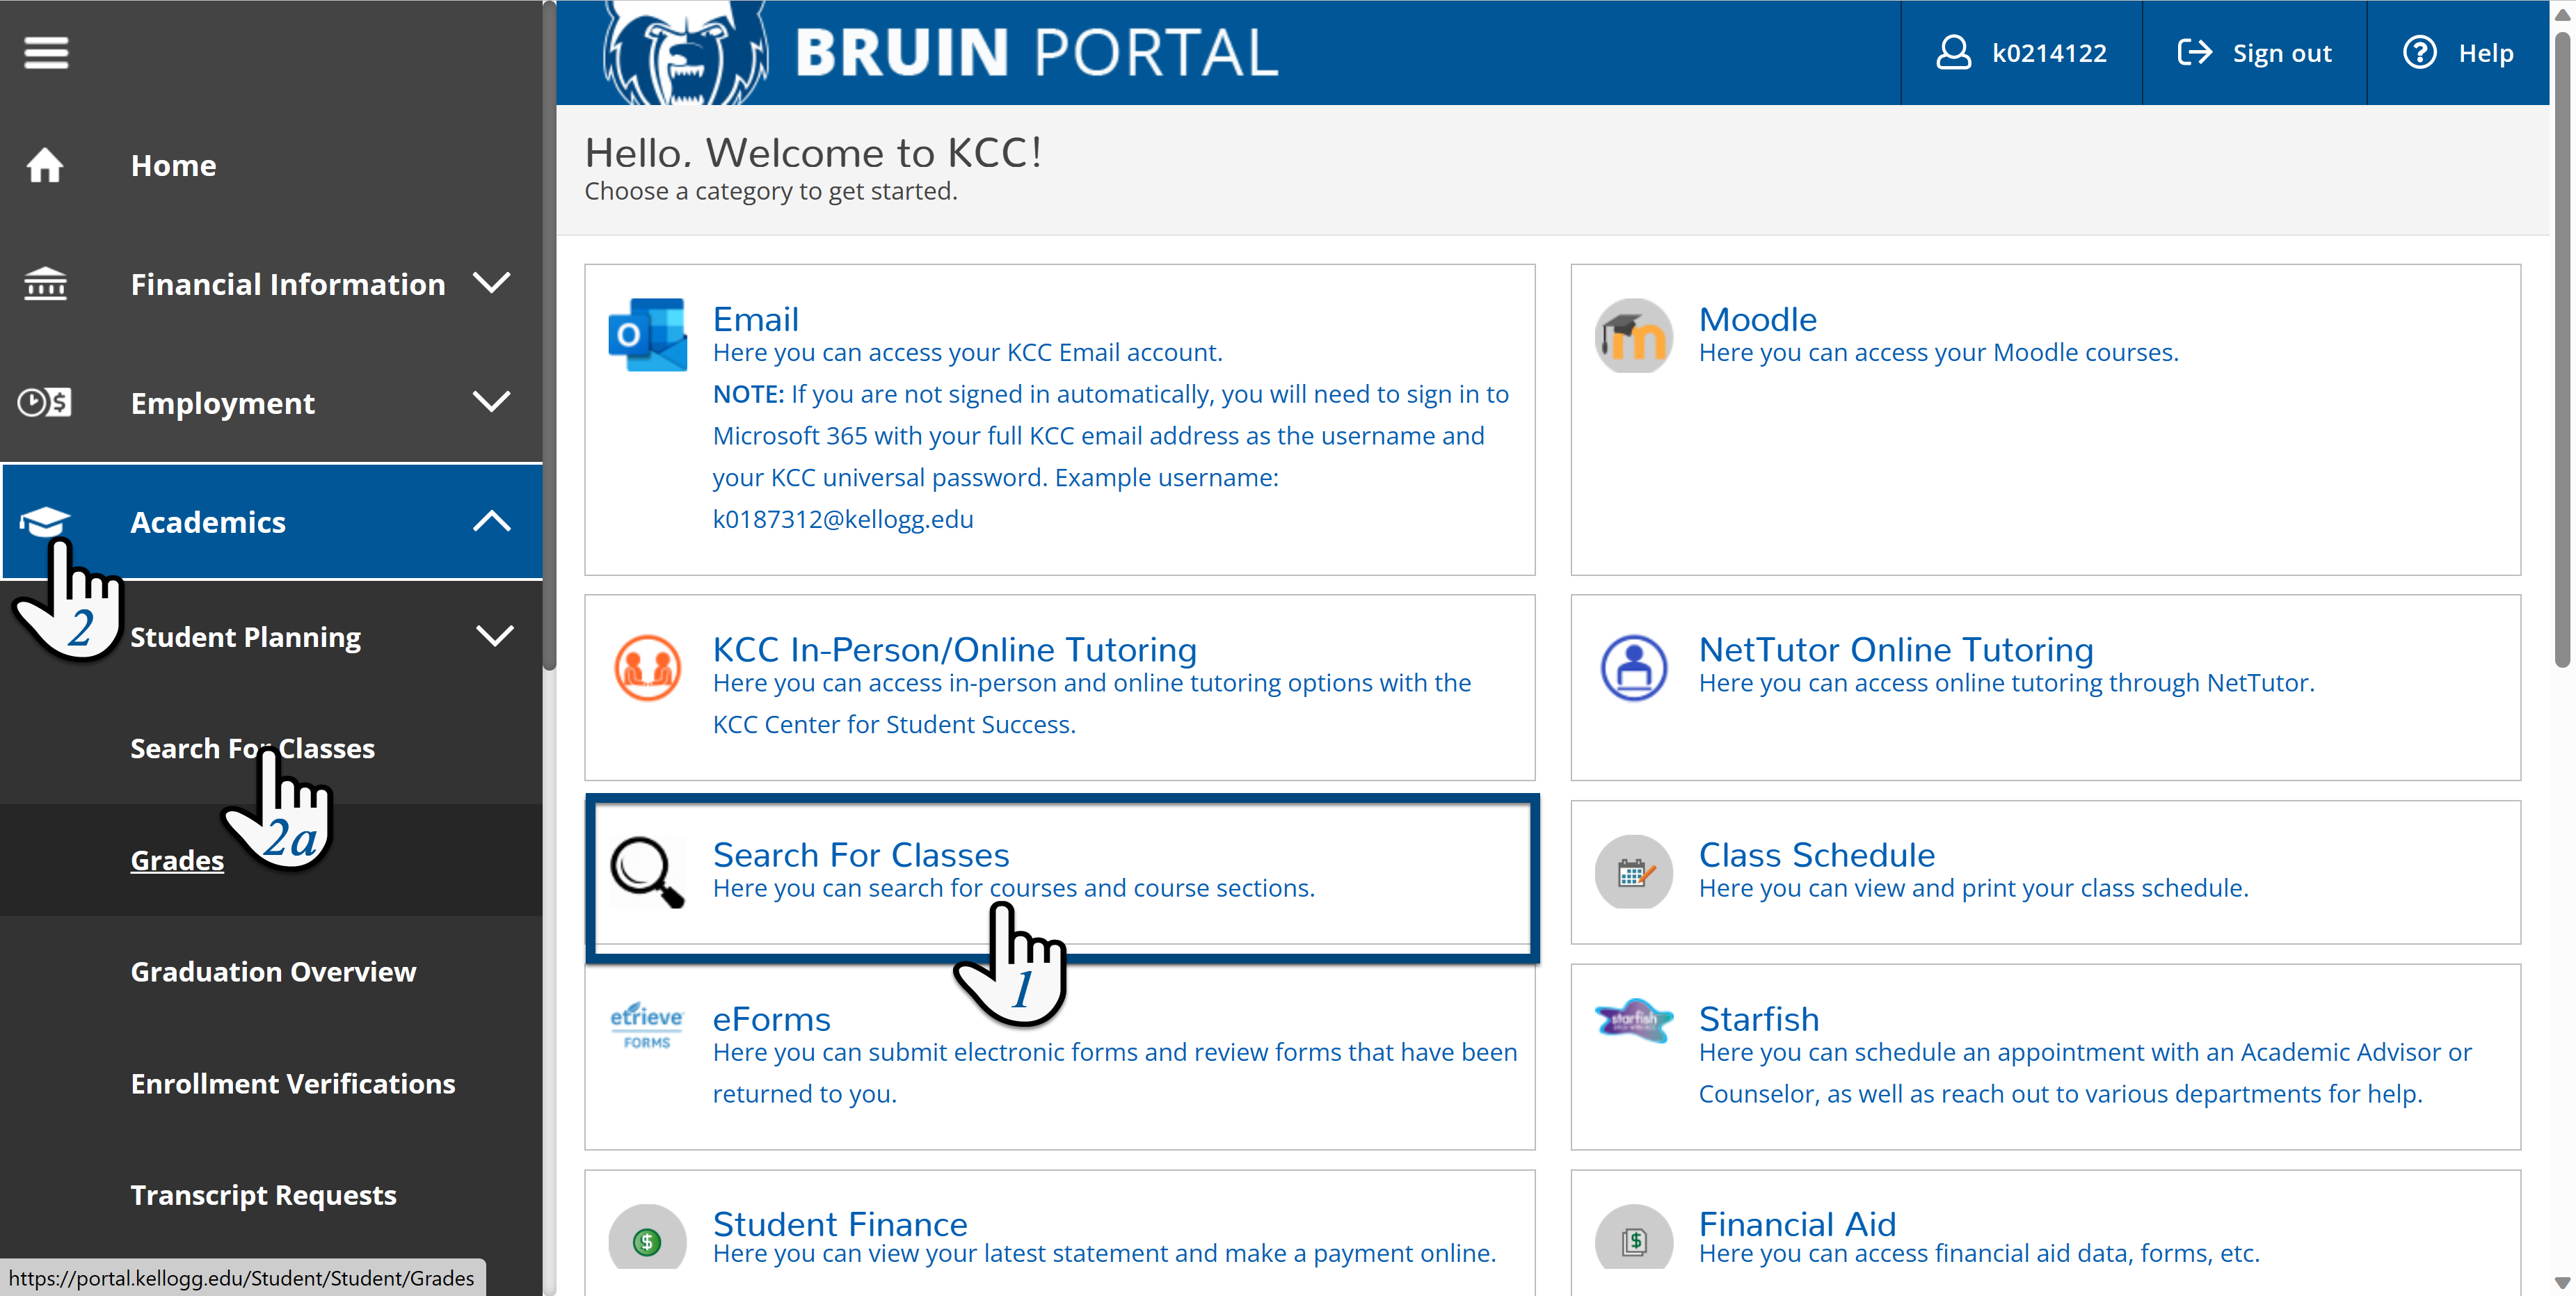
Step 4: From the Search for Courses and Courses Sections, there are a few different ways of searching
- Search for a specific course
- Enter a subject to search
- Click on a subject from the list

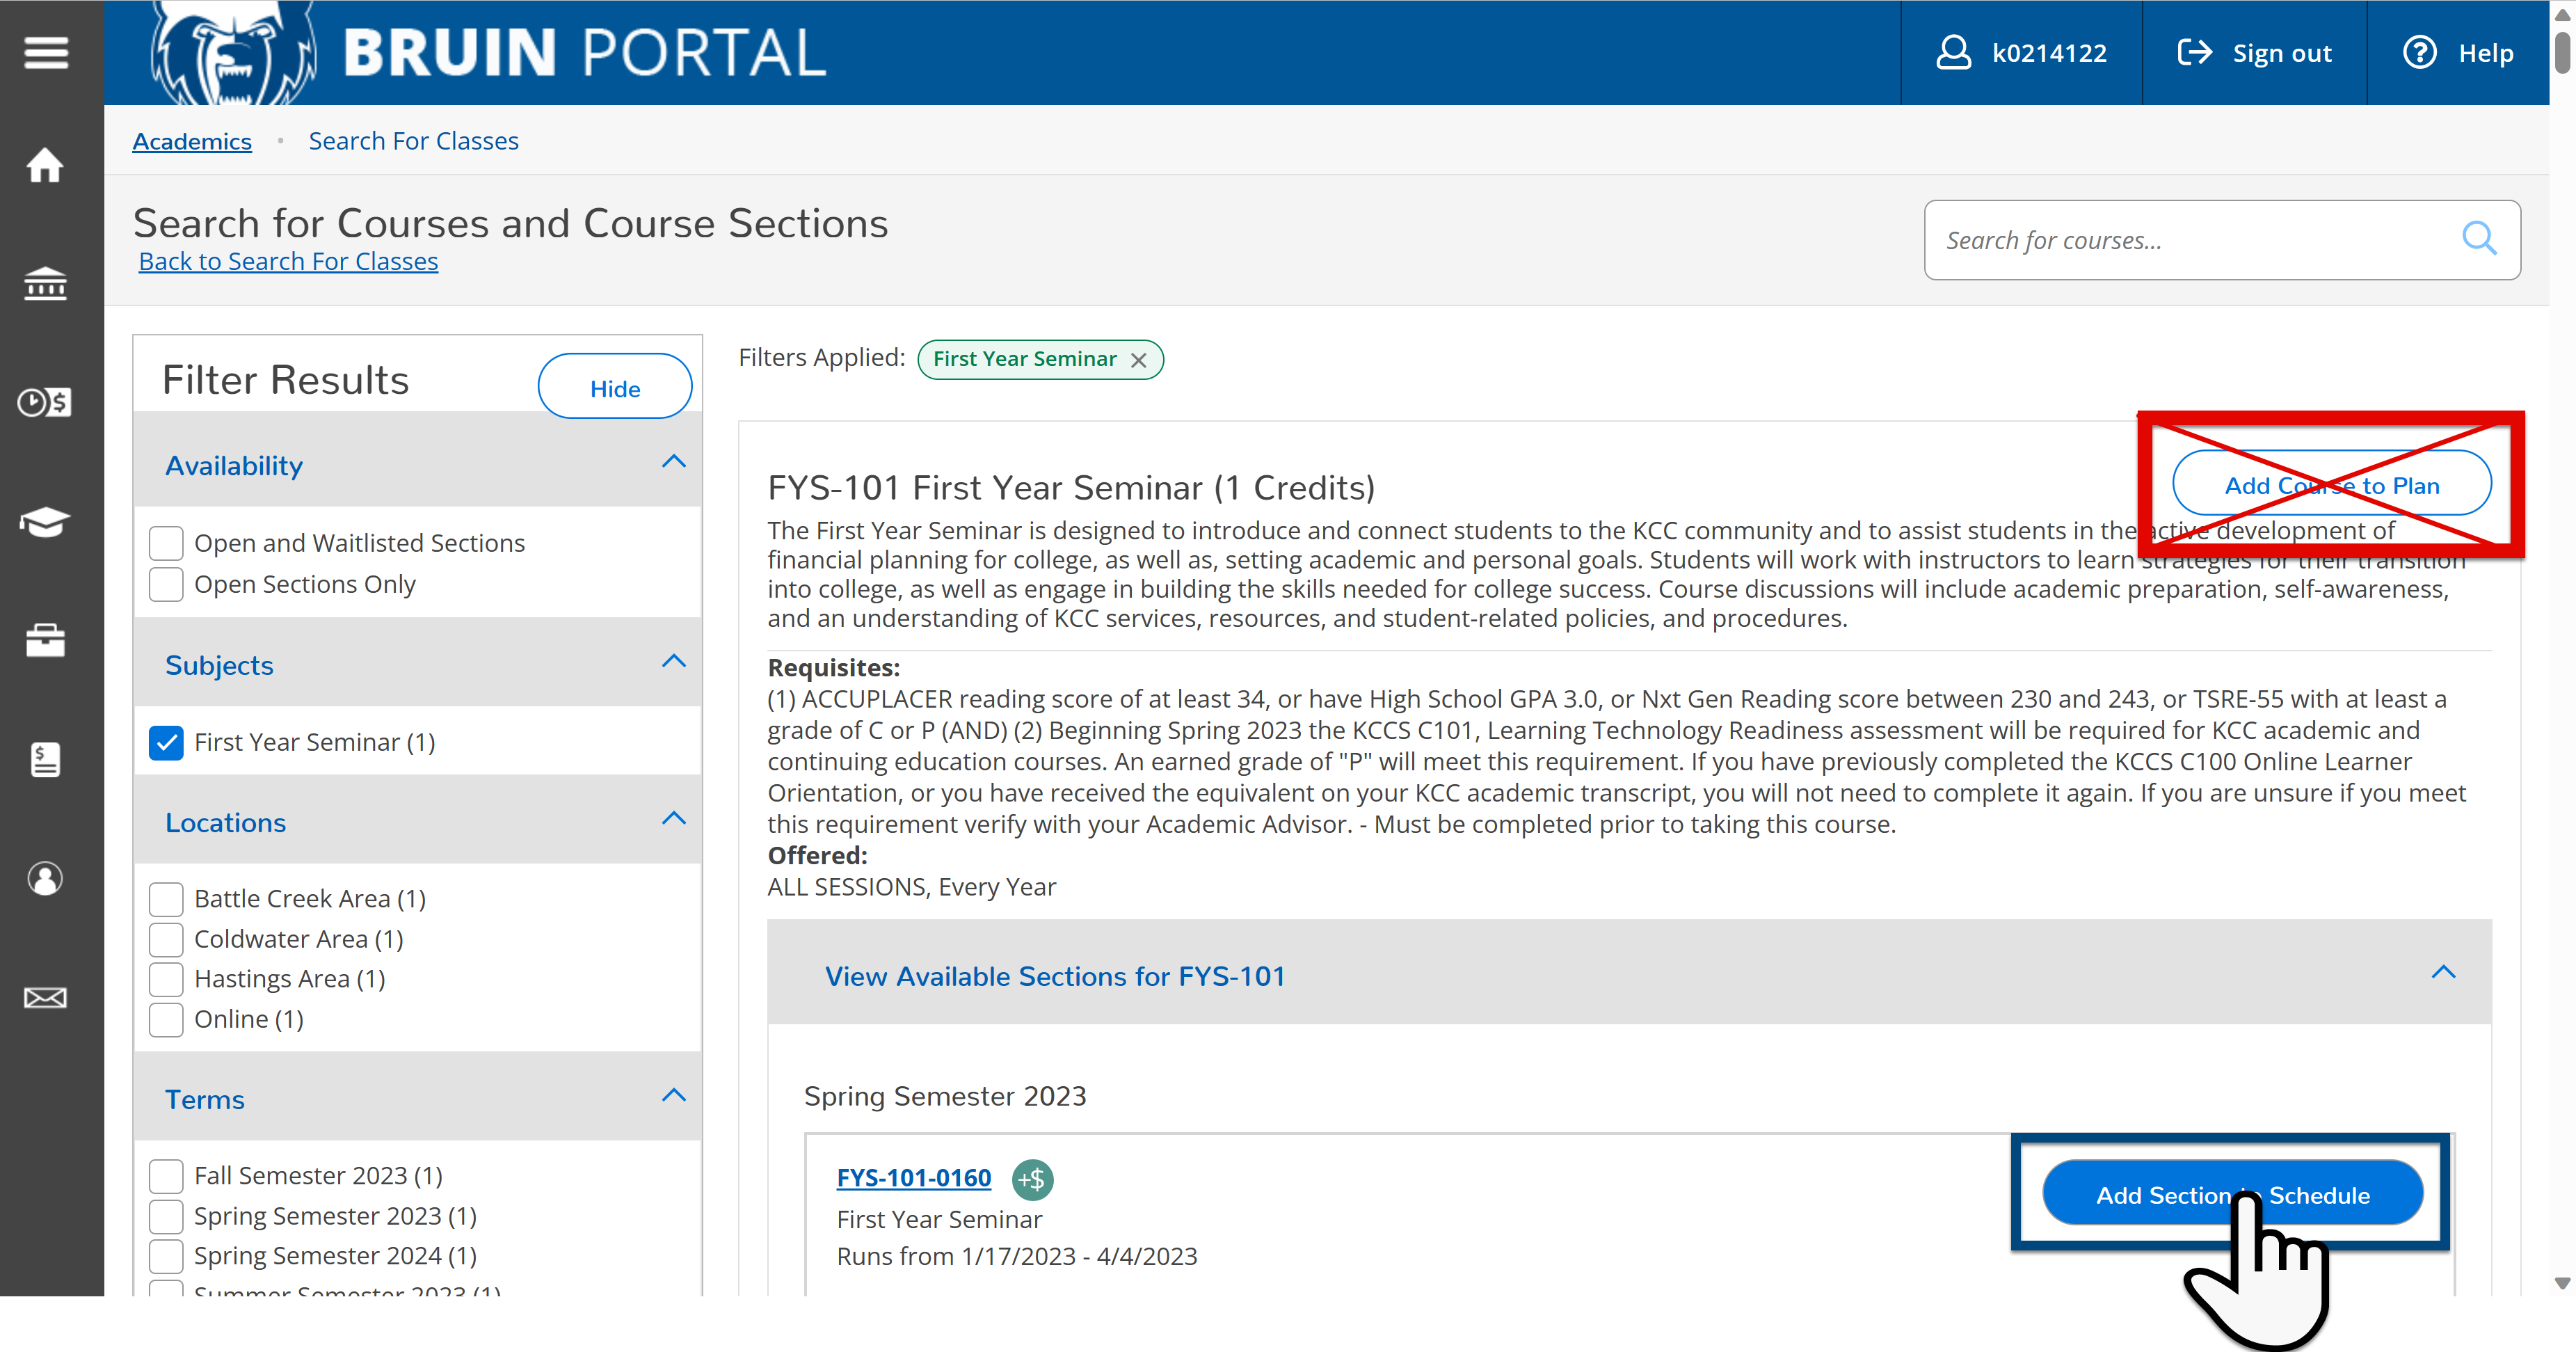
Step 5: Once you have searched for a the subject;
- Select the Term on the left side of the screen
- Click on View Available Sections for (course)
*Note the “Add course to Plan” is designed for future semesters as a place holder on when to take your courses. This is not section specific.

Step 6: Once you have located the course that best fits your schedule, click on Add Section to Schedule
*Note: the “Add course to Plan” is designed for future semesters as a place holder on when to take your courses.
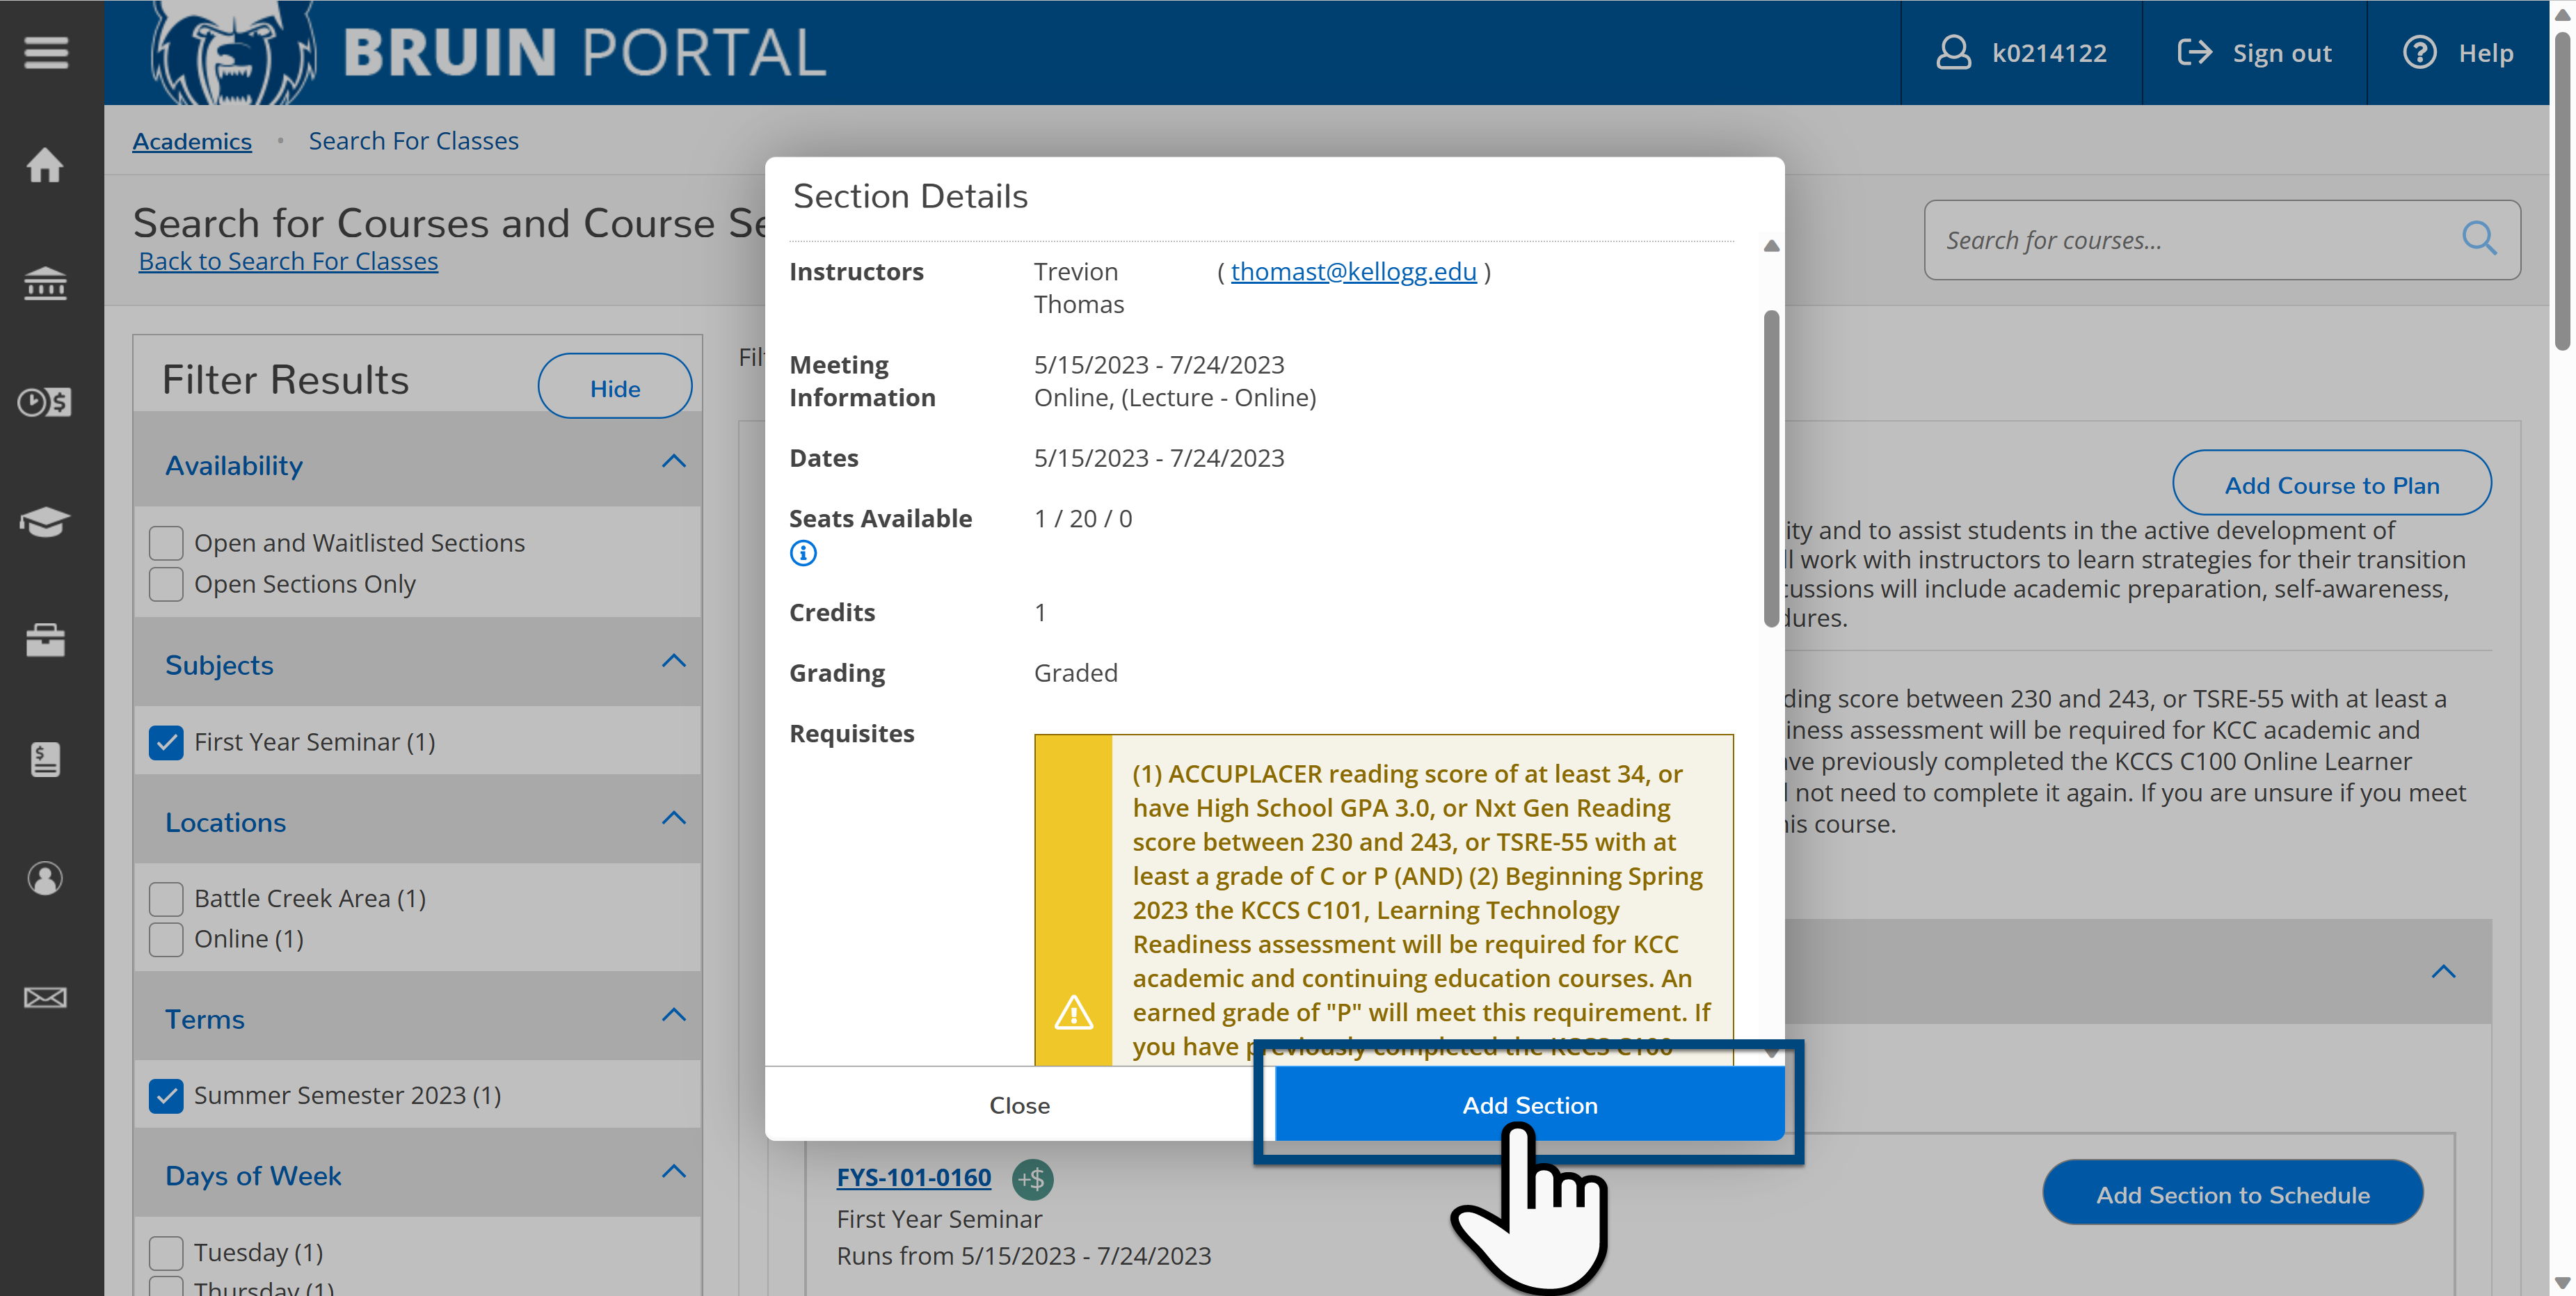
Step 7: A pop-up window will appear for you to verify all the section details and show any prerequisites. Click Add Section to add it to your plan.
*Note: Adding the section to the schedule puts the course on your Plan.
Planned courses are not registered.
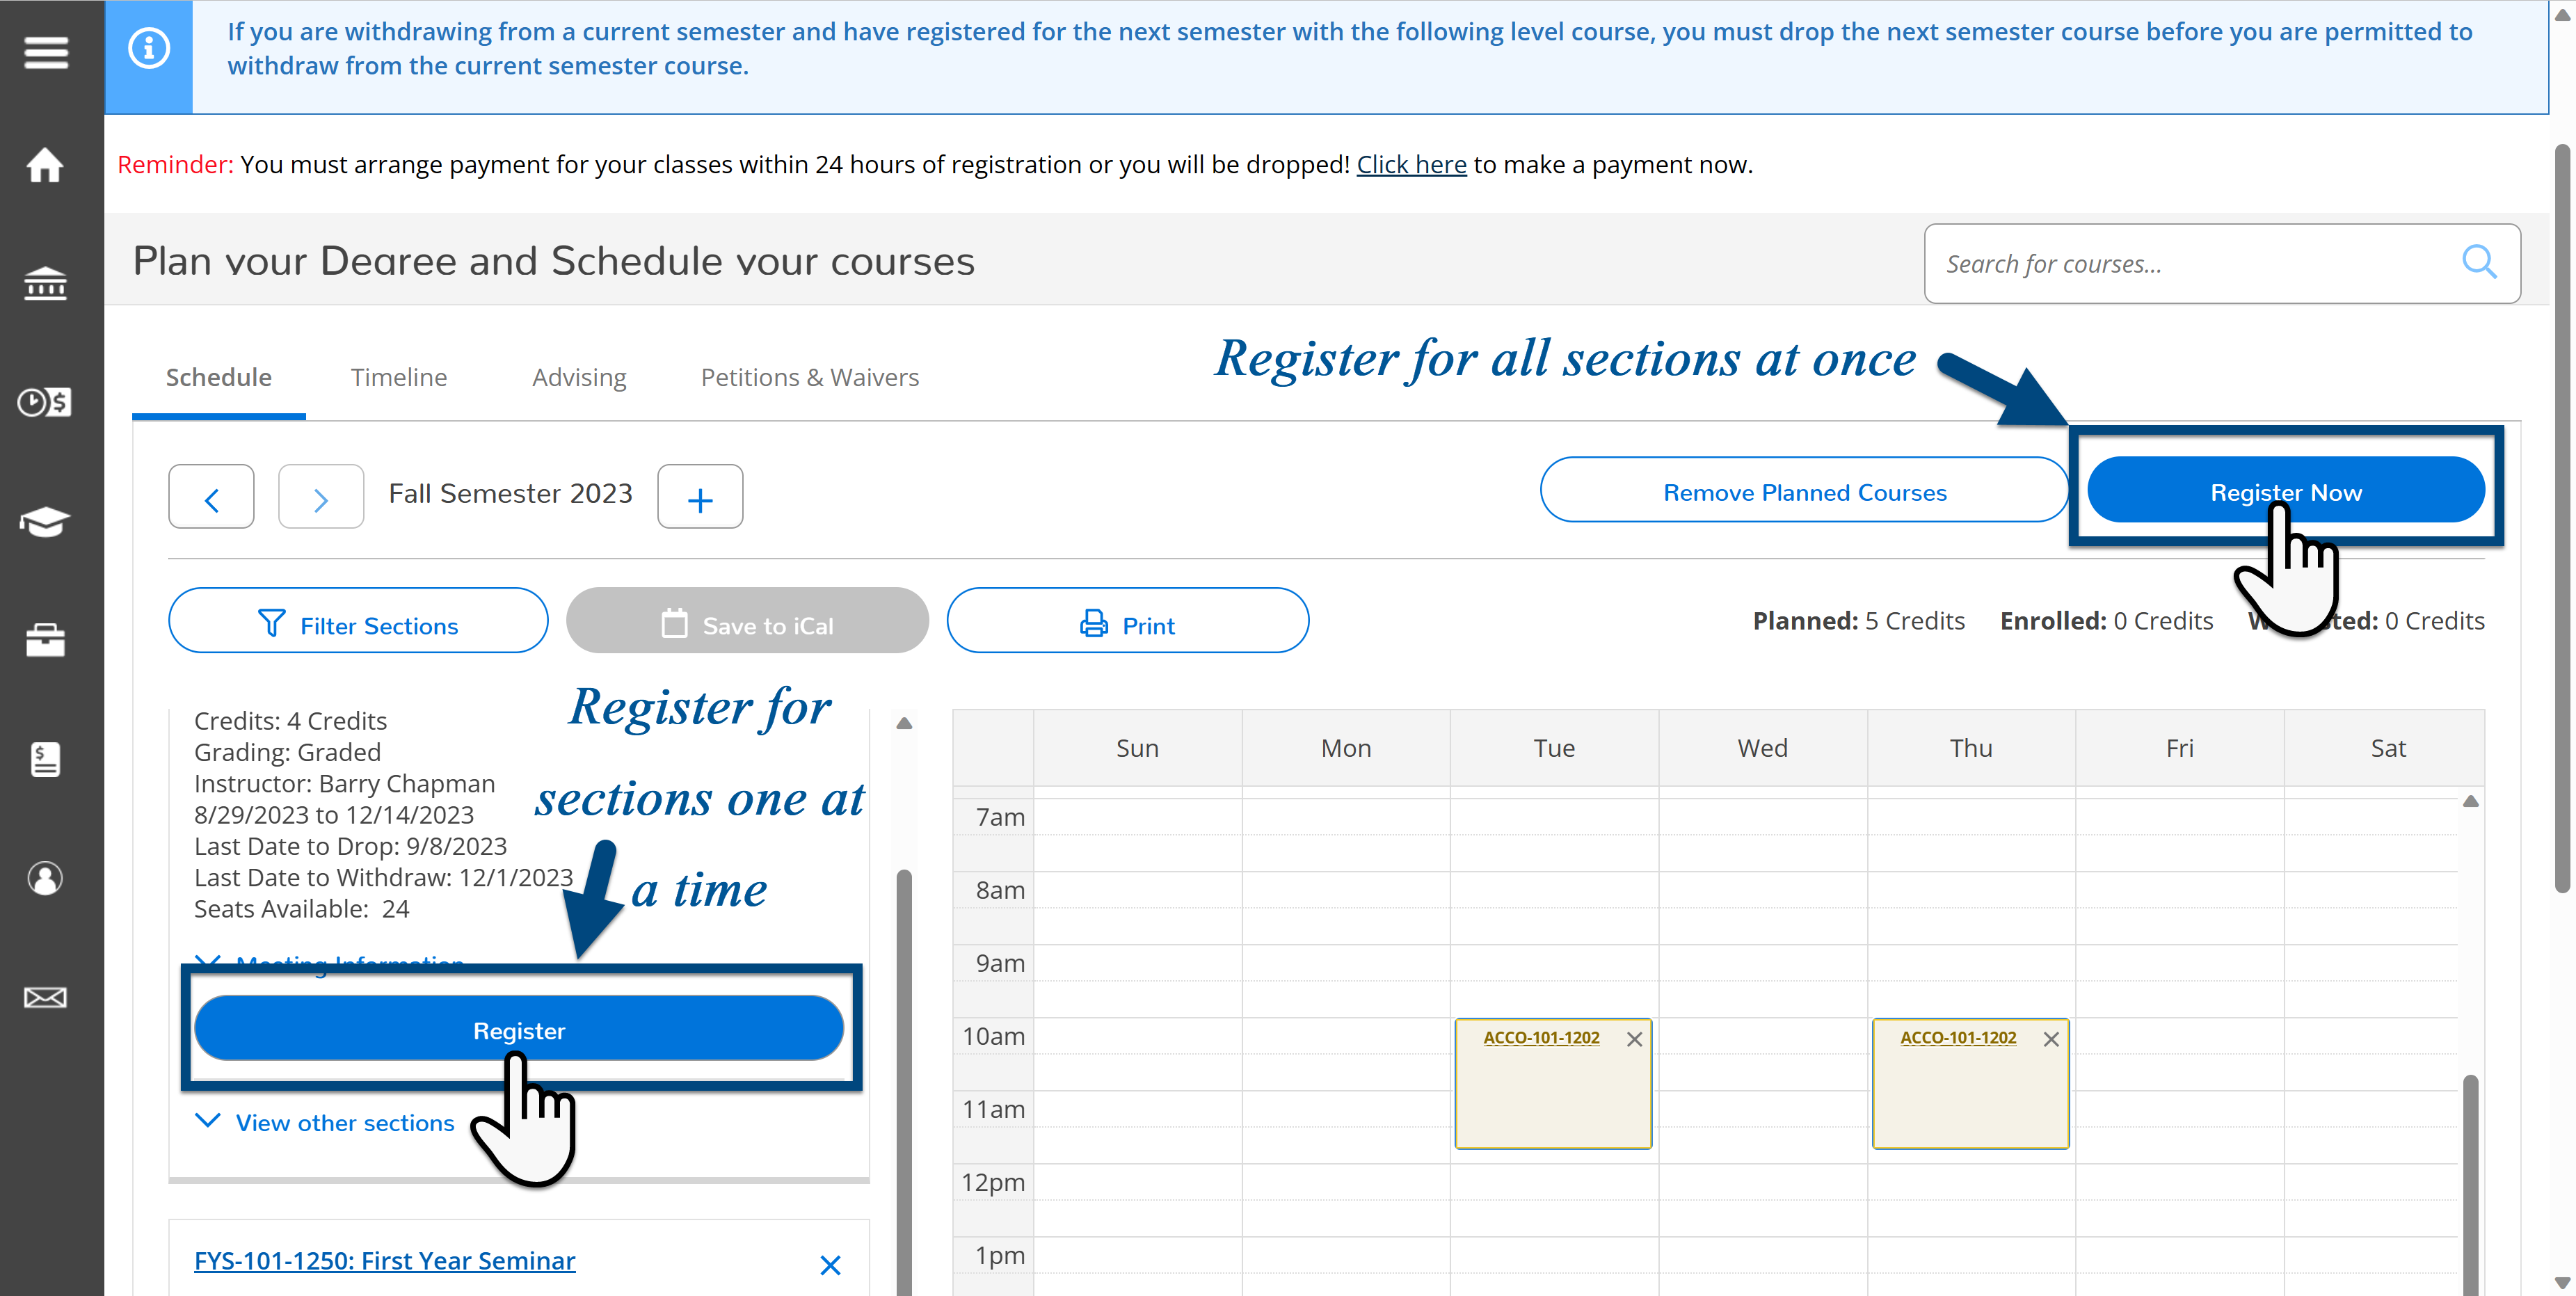
Step 8: On the left side of the screen click on
- Academics (graduation cap image)
- Student Planning
- Plan & Schedule
Step 9: To register for all sections at once, click on Register Now, located at the top right of the screen. Or there is a Register button under each course listed on the left side of the screen.
*Note: Online courses do not show on the calendar as they do not have a specific meeting time. They are at the very bottom of the screen.
Now that you have successfully Registered for courses you will need to setup a Payment Plan
Visual representation of Registered, Planned and Conflicting courses.
-
Registered courses are green in color
-
Planned courses are yellow in color
- Conflicting courses are red in color
